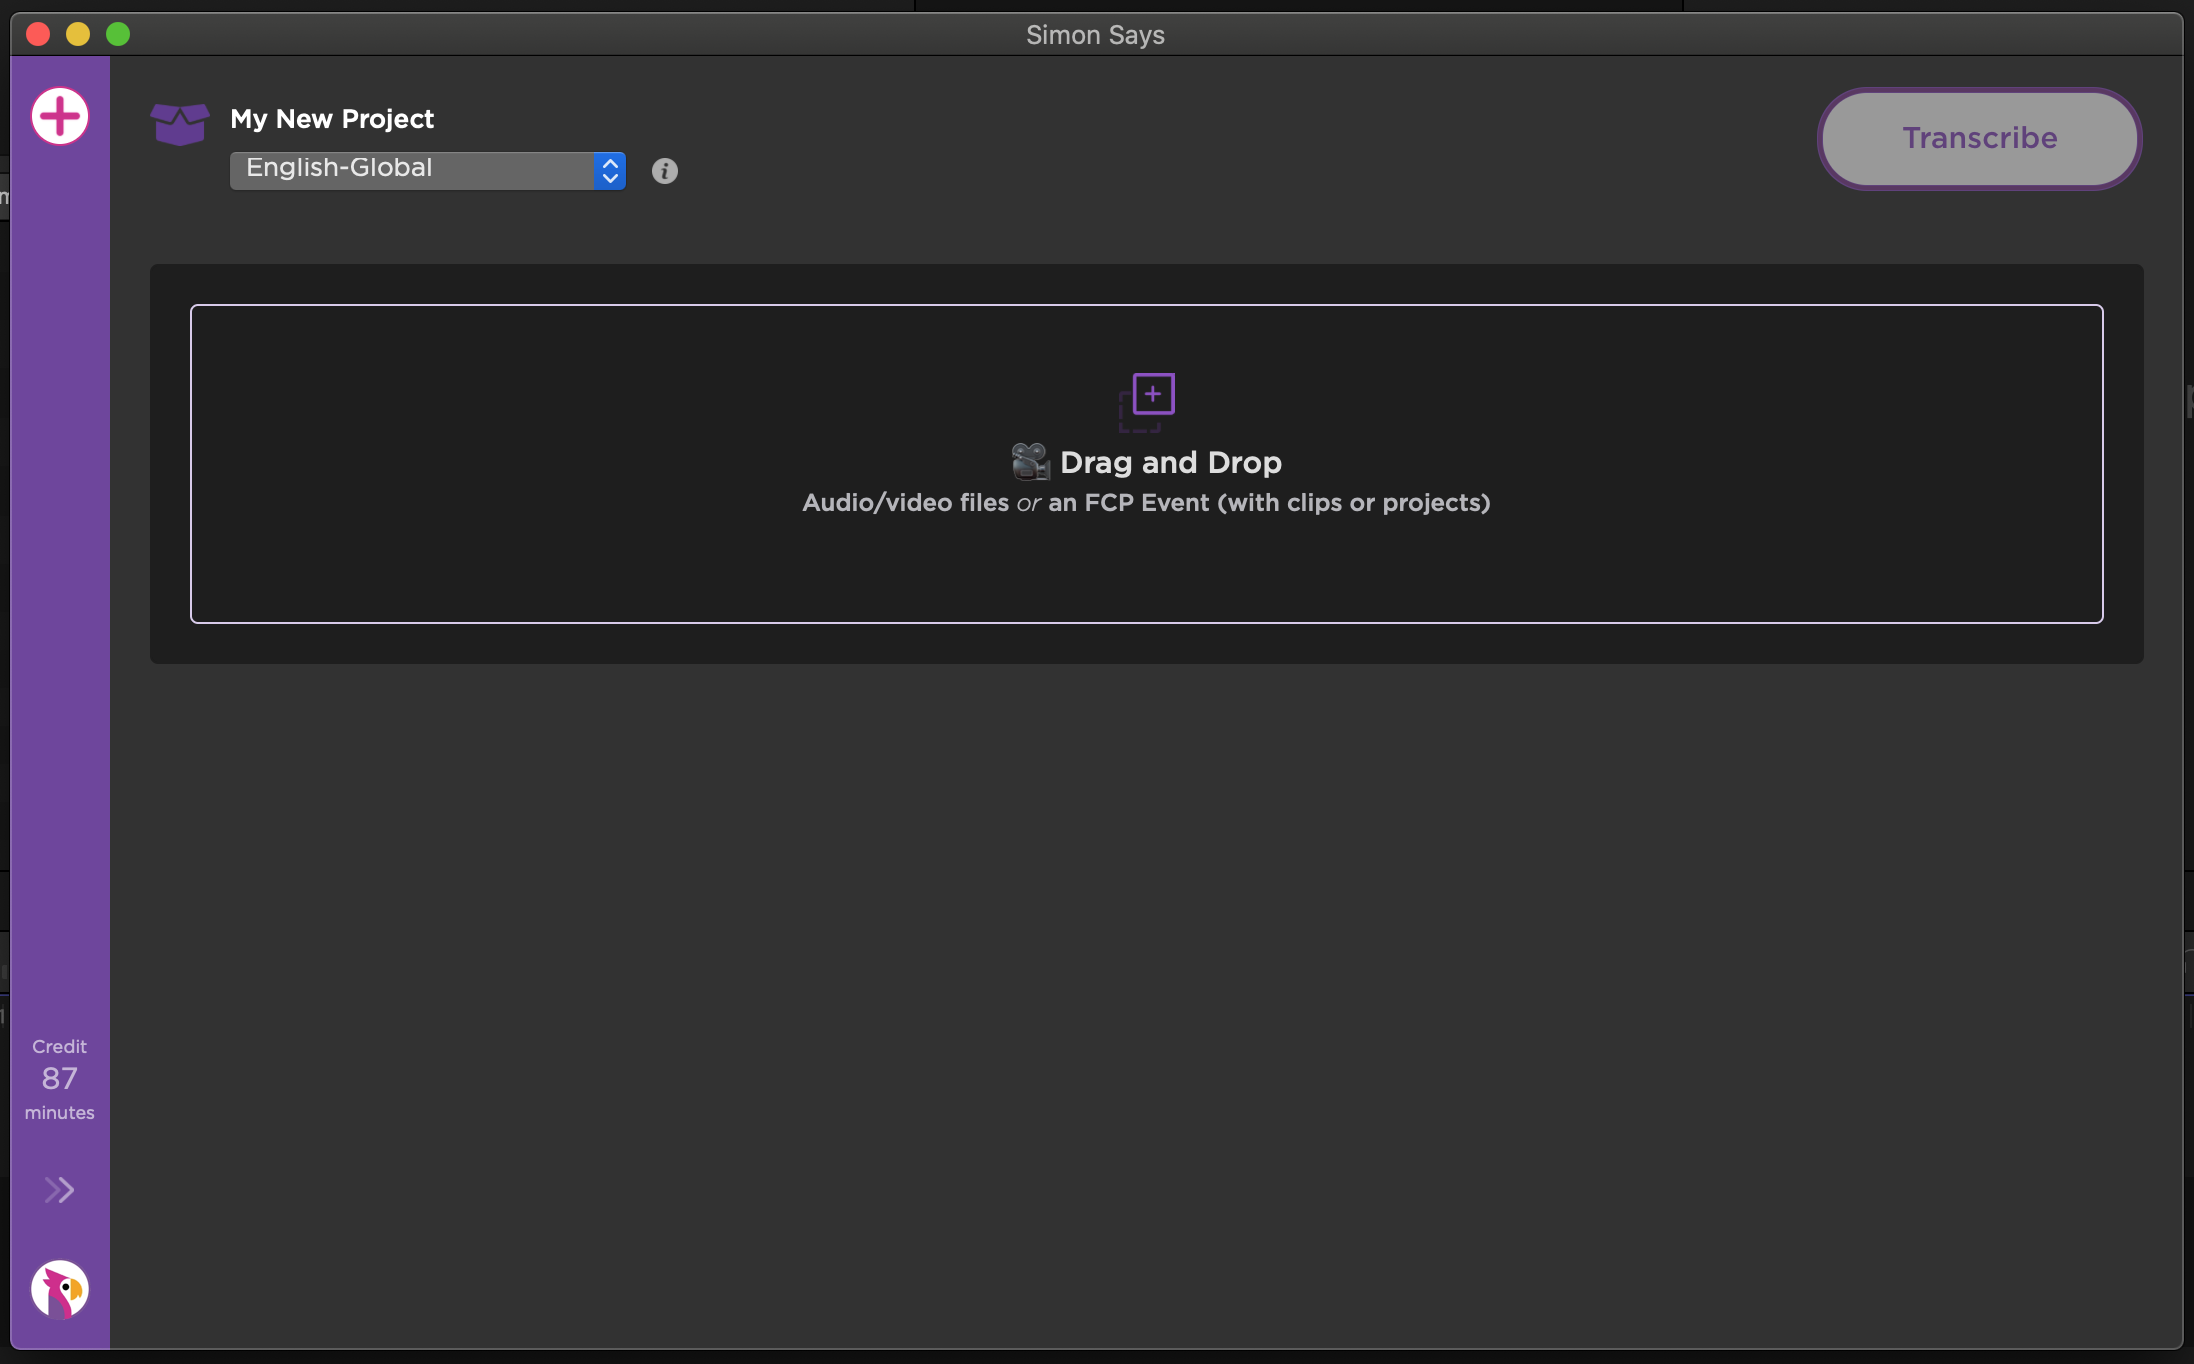
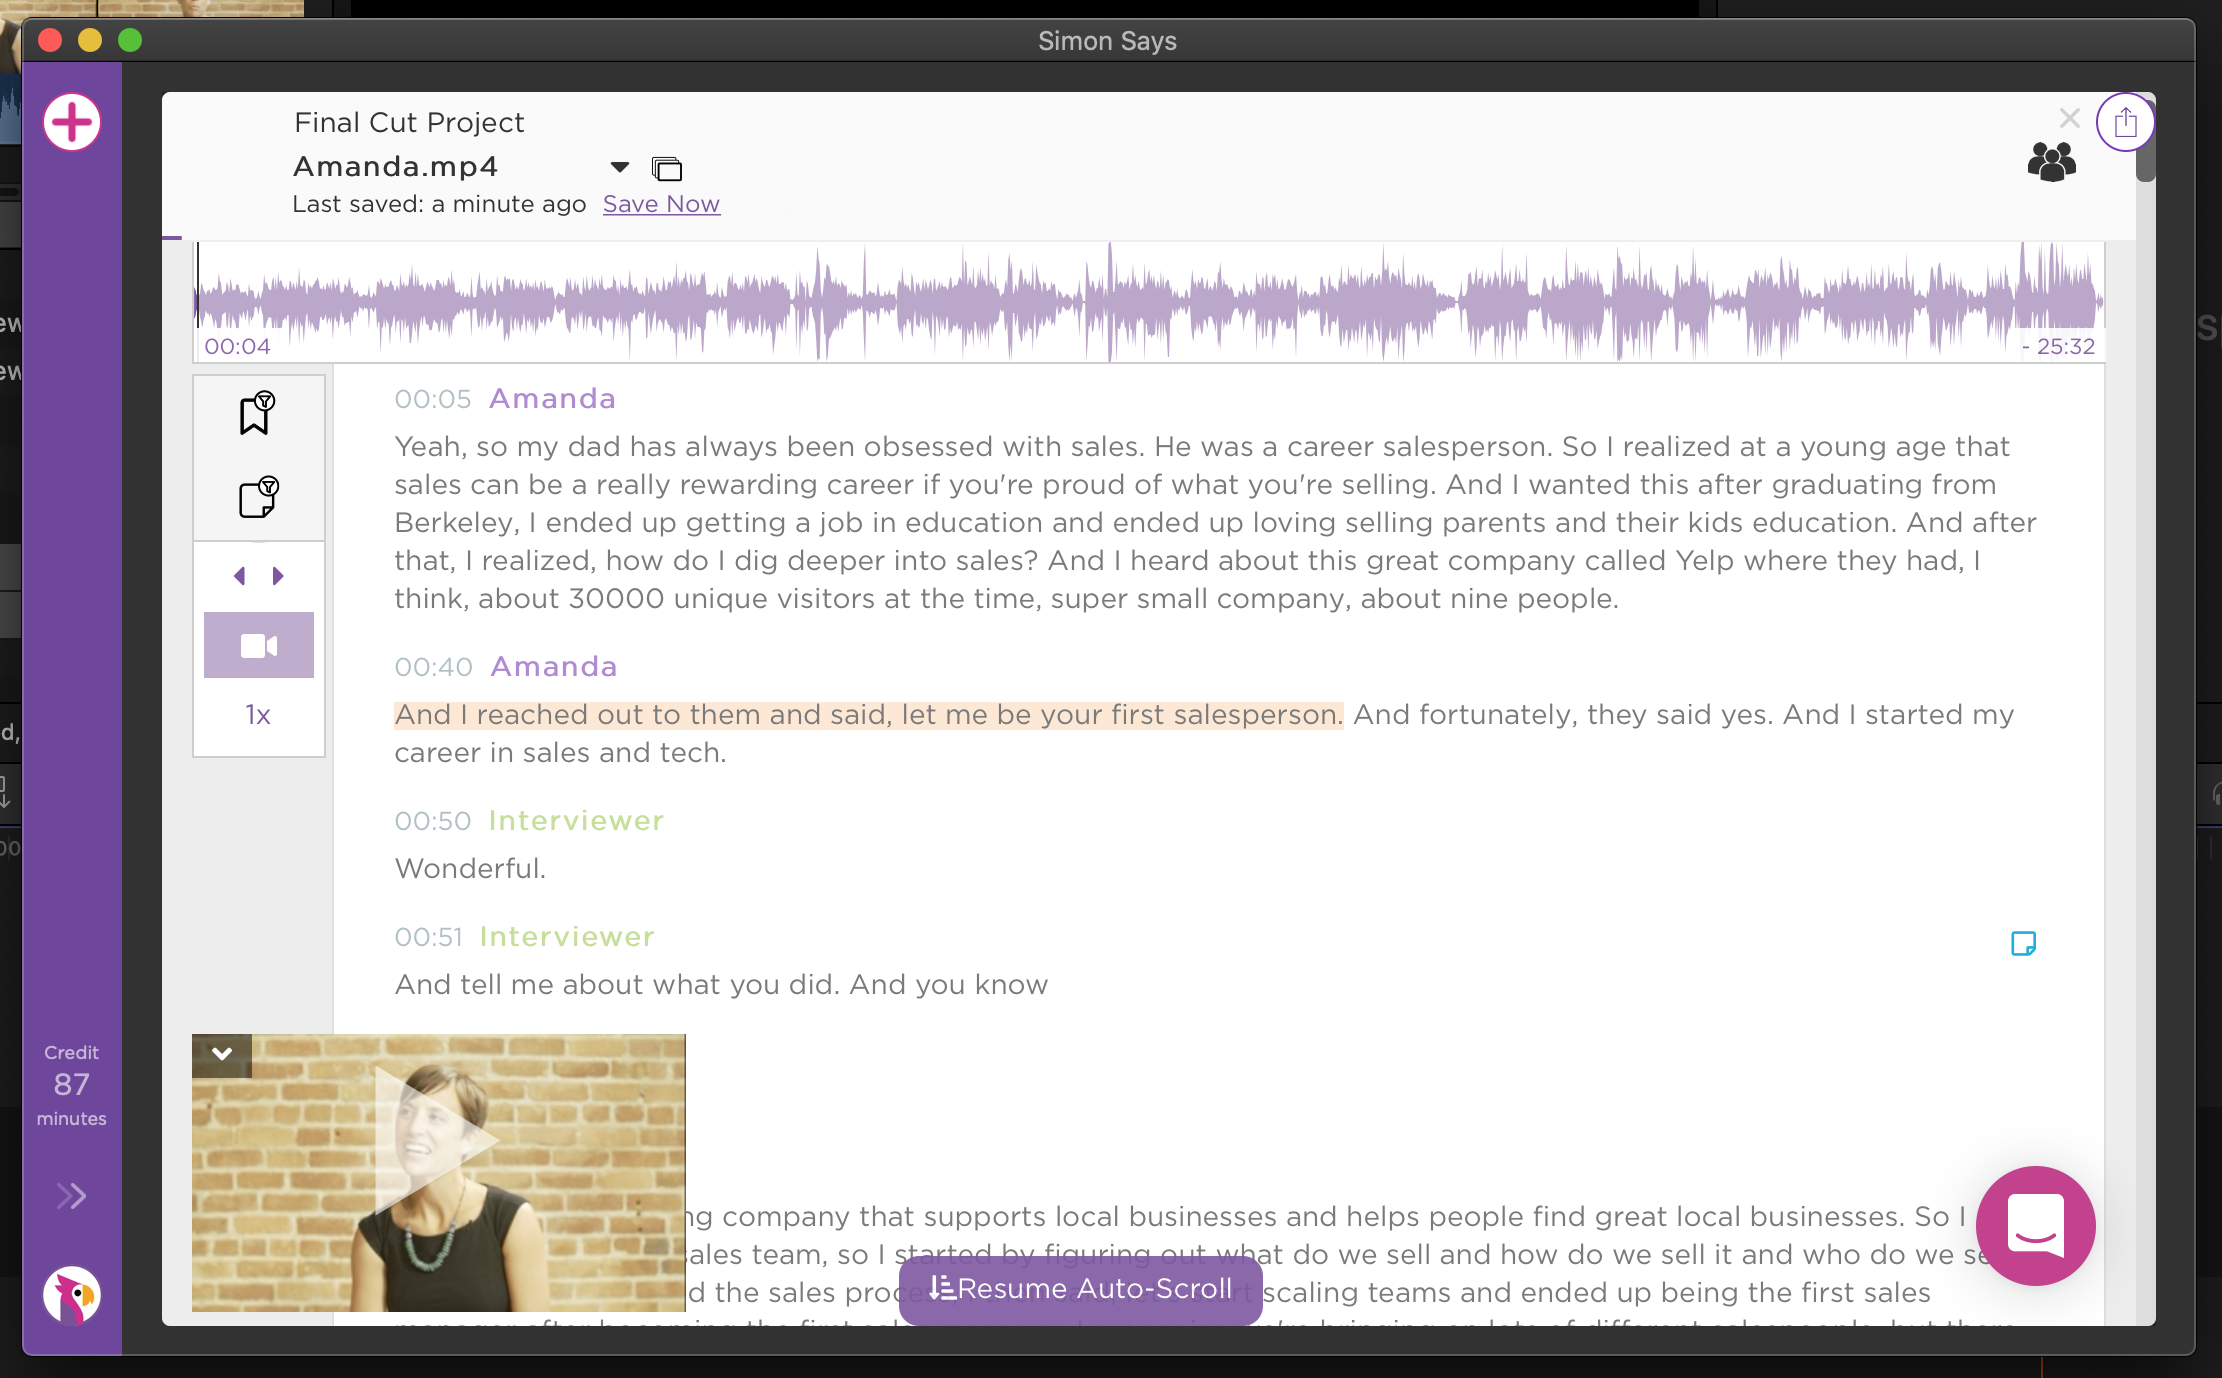
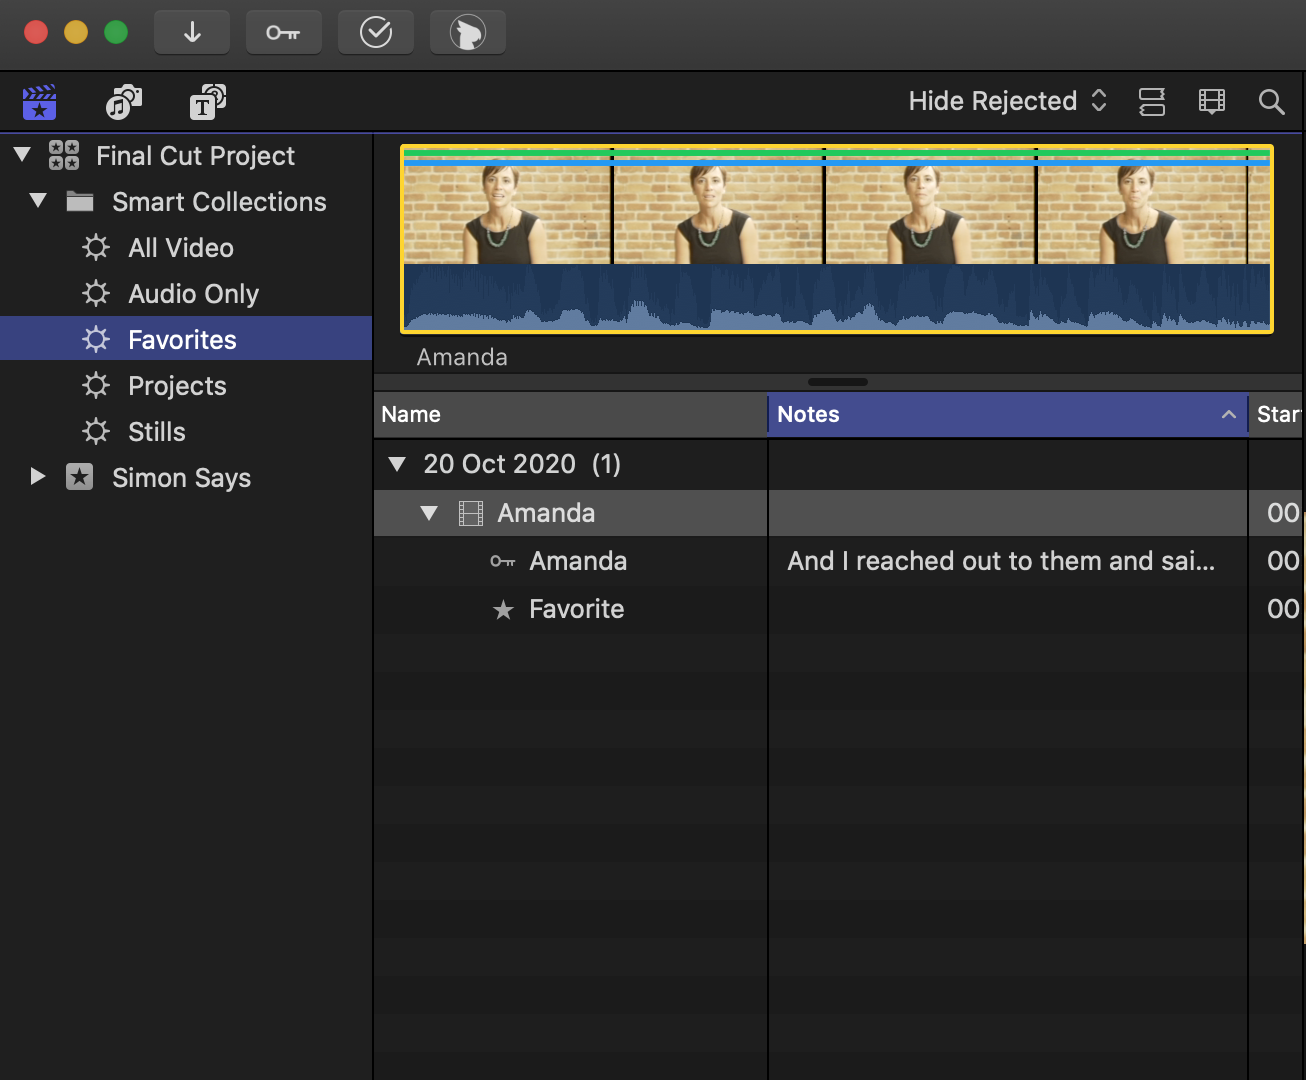
Organizing and sorting clips takes a huge chunk of the post-production process, and for good reason - it helps editors assemble a coherent and compelling story. Want to make the workflow easier though? Then transcribe clips and attach searchable transcript ranges (markers) to them for faster editing. If you're using Final Cut Pro X, this will be much easier than you think. With the Simon Says native FCPX integration, you can get accurate, timecoded transcript ranges for your clips in just a few minutes. Keep reading to learn how!
How to transcribe clips in Final Cut Pro X (FCPX) to receive ranges/markers

1. Download/Install the extension

Download the Simon Says macOS App from the Mac App Store. Launch the extension and create a new project by clicking on the circular plus button.

2. Import clips and transcribe

Use the Simon Says share destination option in FCP to send clips to Simon Says. You can import sync and compound clips this way and to import multicam clips, simply drop the clip onto the Simon Says Mac app. Your clips will transcode and upload. Select the language of your clips, click ‘Transcribe', and pay to get started.

3. Edit transcript, bookmark snippets, and add speaker labels

The transcription completes in a few minutes. Awesome! Click ‘Edit’ to use the nifty video-transcript editor to create or join new rows – Simon Says will update the timecode automatically. Highlight and bookmark the text to mark snippets as ‘Favorites’ in FCPX. Or highlight and strikethrough the text to reject snippets instead. You can also add speaker labels by clicking on the caret icon: Simon Says utilizes automatic speaker identification to match rows to the same speaker. If you conducted a foreign language interview and need to translate it, do this step here: click export and select from 100+ languages for translation.

4. Import transcript back to FCPX clips

Go to ‘Export’ > ‘Final Cut Pro X’, and select ‘Ranges’. Drag and drop the ranges icon into your FCPX event and your transcript will automatically attach to your clips as ‘Notes’, along with speaker, favorite, rejected labels as applicable.

Your FCPX clips are now transcribed and with ranges that are searchable, making it so much easier to sort by speakers and find your favorite shots. Happy editing!
How to transcribe clips in Final Cut Pro X (FCPX) to receive ranges/markers
Your FCPX clips are now transcribed and with ranges that are searchable, making it so much easier to sort by speakers and find your favorite shots. Happy editing!

Try Simon Says for free.

Sign Up

15 minutes free credit

Search other workflows

15 minutes free credit