How to Add Subtitles in DaVinci Resolve
Available for both Mac and Windows devices, Blackmagic Design’s DaVinci Resolve Studio offers a lot when it comes to creating beautiful text and subtitles. In this step-by-step beginner’s tutorial, we’ll go over how to add subtitles in DaVinci Resolve 16, DaVinci Resolve 17, and DaVinci Resolve 18.
This guide will also show you how to use Simon Says’ transcription and captioning software to work with subtitles directly in DaVinci Resolve seamlessly.
How to manually add subtitles in DaVinci Resolve
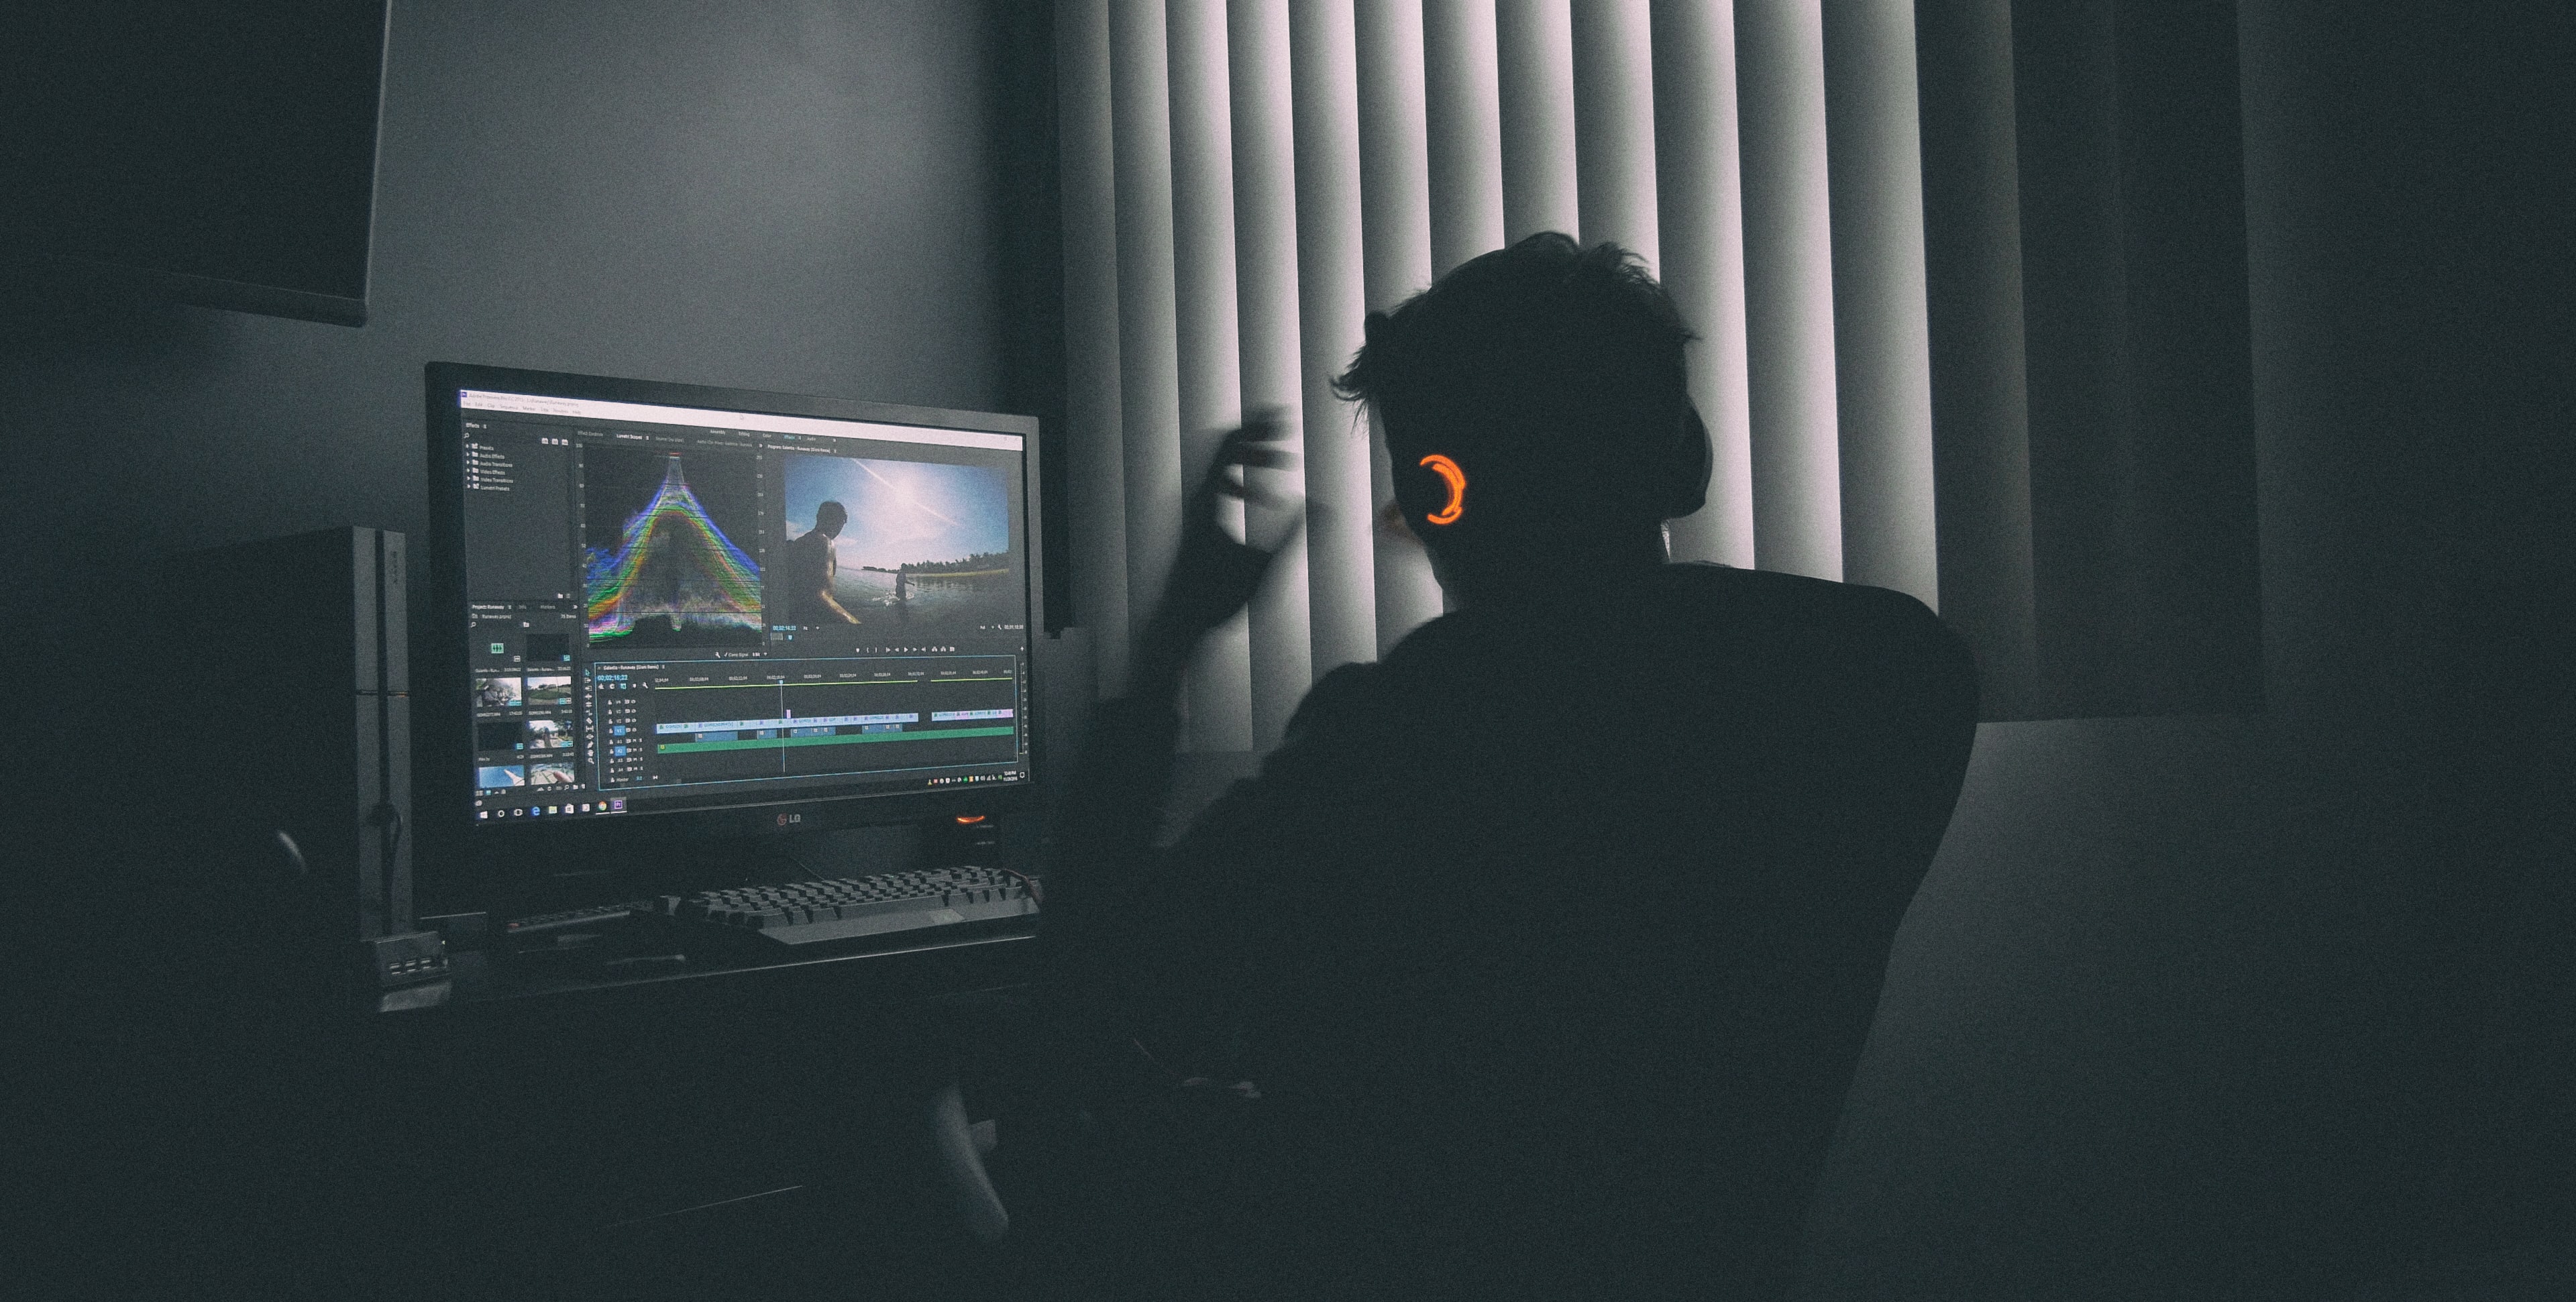
Adding subtitles is incredibly simple within DaVinci Resolve making it great for professional video editors as well as those just dipping their toes into video editing.
First, let’s go over why subtitles are so important for any video content creator or filmmaker. Subtitles are simply text displayed on screen visually informing audiences of any audio happening via text.
Text is a great tool to get information across to your audience. It can be used in tutorials to emphasize a point to your viewers, used to grab audiences’ attention at the start of the video, and generally used to get as much information out on screen as possible.
Text can range from simple title screens or credits to complex motion graphics with slick animation and colorful fonts. The text you use will entirely depend on the type of content you’re looking to create.
A filmmaker, for instance, is most likely going to use text sparingly in DaVinci Resolve. For instance, text might only be used for the opening title and credits, barring a few exceptions.
However, there are definitely areas where filmmakers can use text creatively. UI Huds, for instance, in films such as Iron Man use text for informational purposes and, of course, subtitles.
Commercial and social media creators are more likely to use text in order to enhance the content seen on screen. The text style in these scenarios tends to be more boisterous and flashy.
Text in advertisements can be used for lower thirds, letting viewers know the person’s name and occupation when they appear on the screen. Videos for platforms like TikTok and Instagram may also use flashy subtitle text to draw people in.
So how do you add text in DaVinci Resolve? Well, the first method is to Manually add subtitles. Manually adding subtitles can be done by opening up DaVinci Resolve and importing or creating a new project. You’ll then want to go to the Navigation bar located at the bottom of DaVinci Resolve and click on the Edit tab.

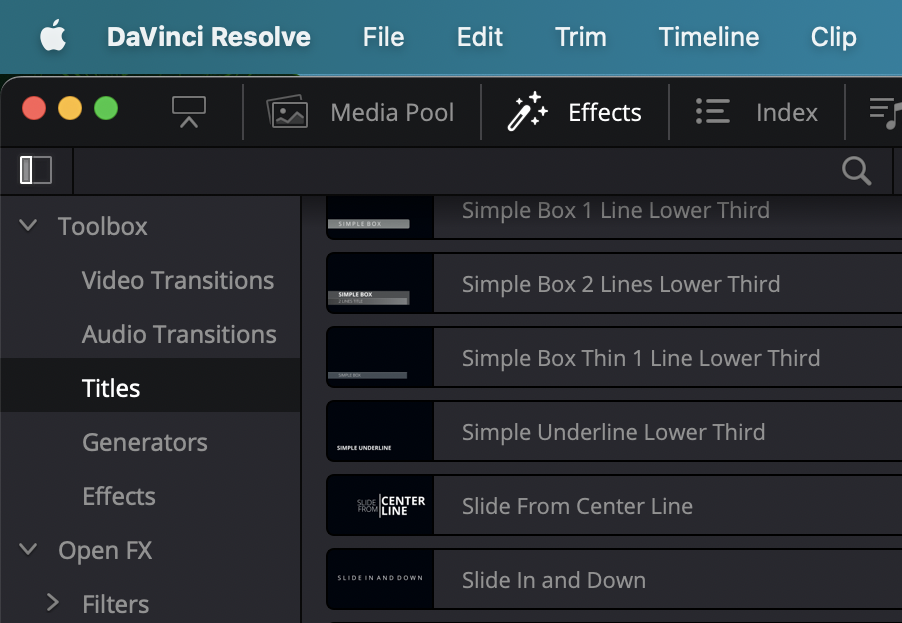
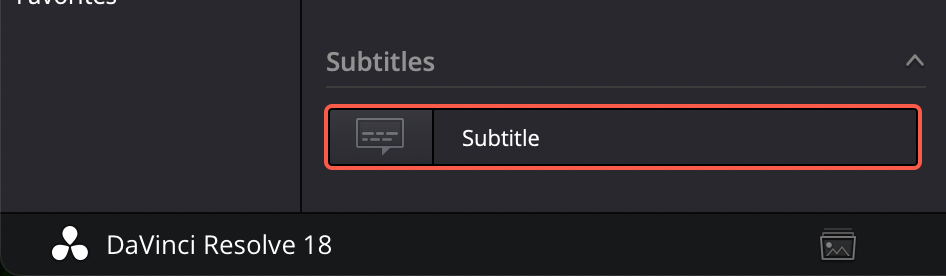
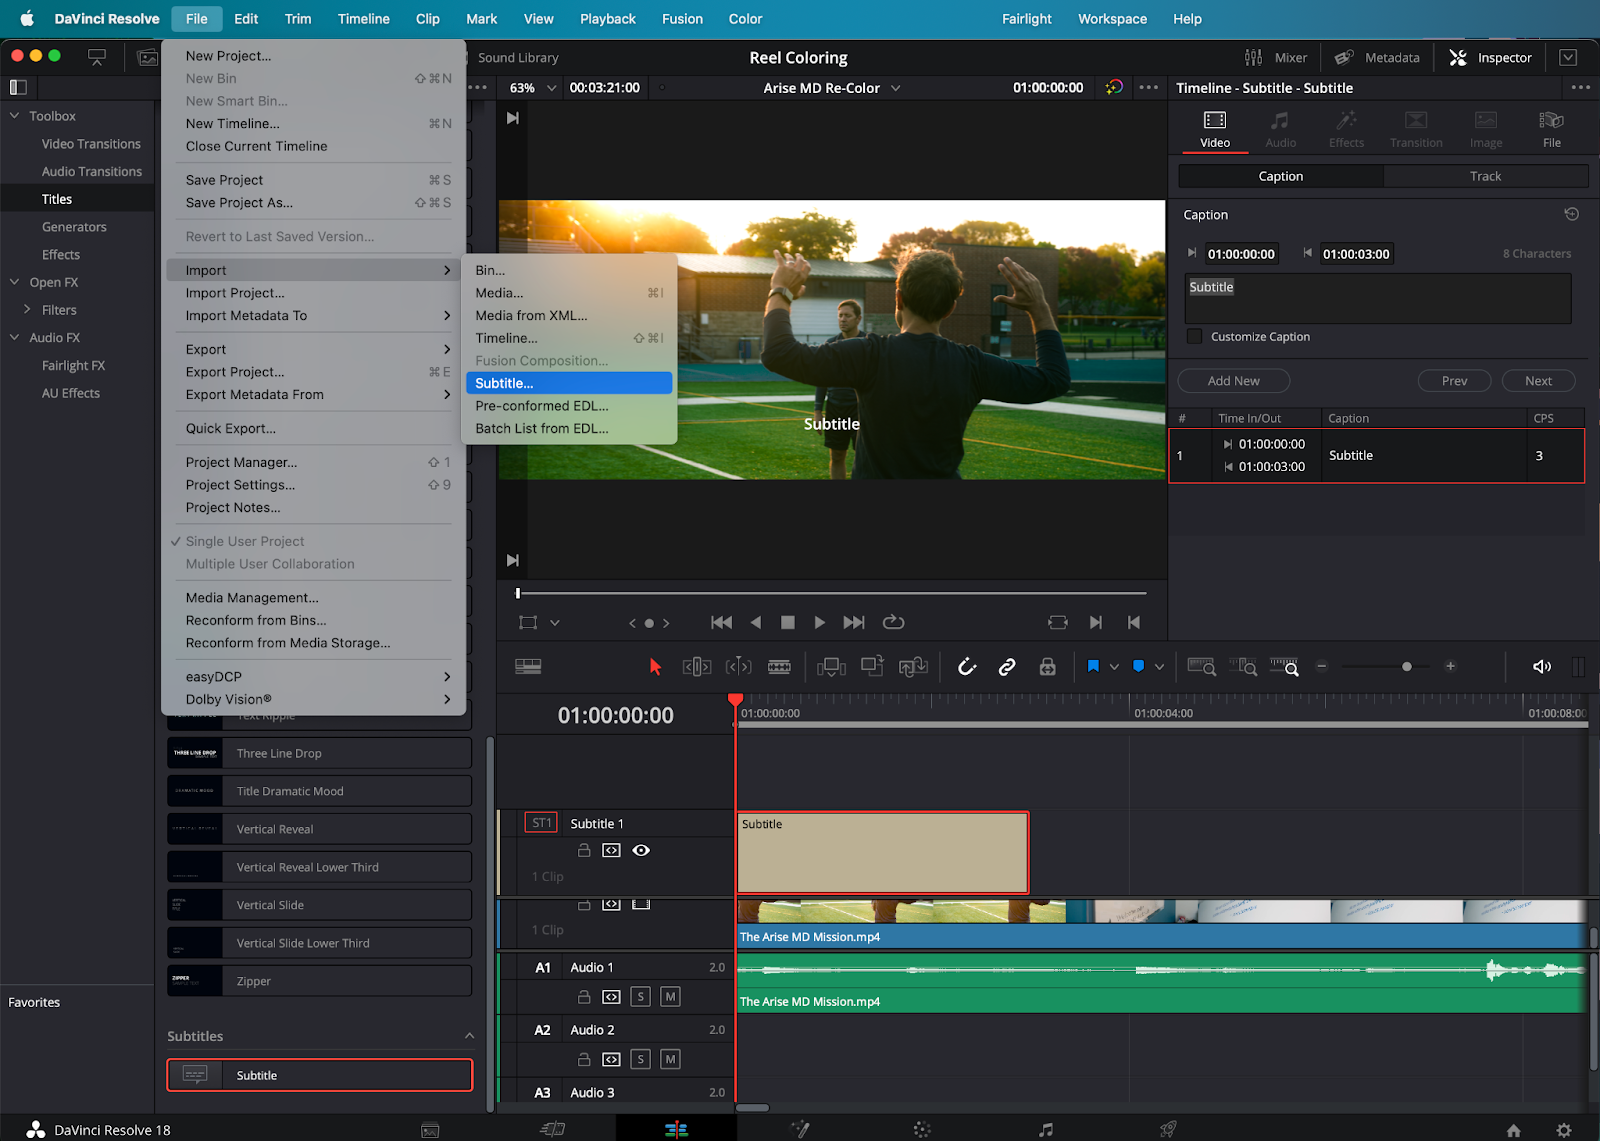
After that, you’ll want to go to the Effects tab which is located on the left-hand side of DaVinci Resolve. Once there, click on Titles and scroll all the way down to the bottom. Here, you’ll find an effect called Subtitles. Drag this effect into your timeline to add it to your project.
Once the subtitles are added to your timeline, you’ll be able to edit them by clicking on the beige subtitle bar that’s now visible. The Inspector tab (located on the right-hand side of the screen) should be split into two different sub-tabs Caption and Track.
Inside the Caption tab are options to time out your subtitles as well as add new ones. You can also customize specific sets of subtitles in the caption tab. The Track tab on the other hand gives you even more customization options for your subtitles which include things such as drop shadow, transform, stroke, and character.

You can time out your subtitles easily by dragging the beige subtitle bar to the left or to the right of the timeline as you would your footage. You’re also able to right-click on the beige subtitle bar to add subtitles as well.
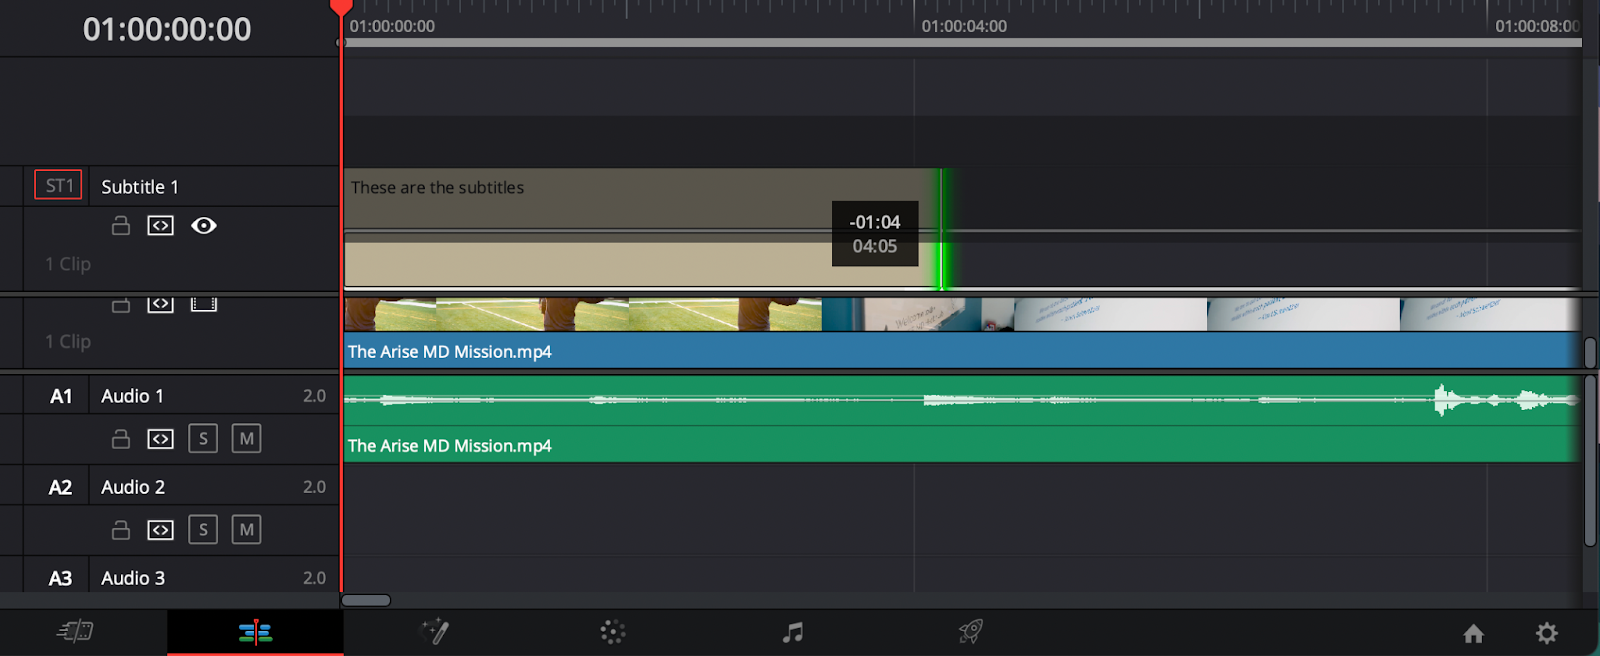
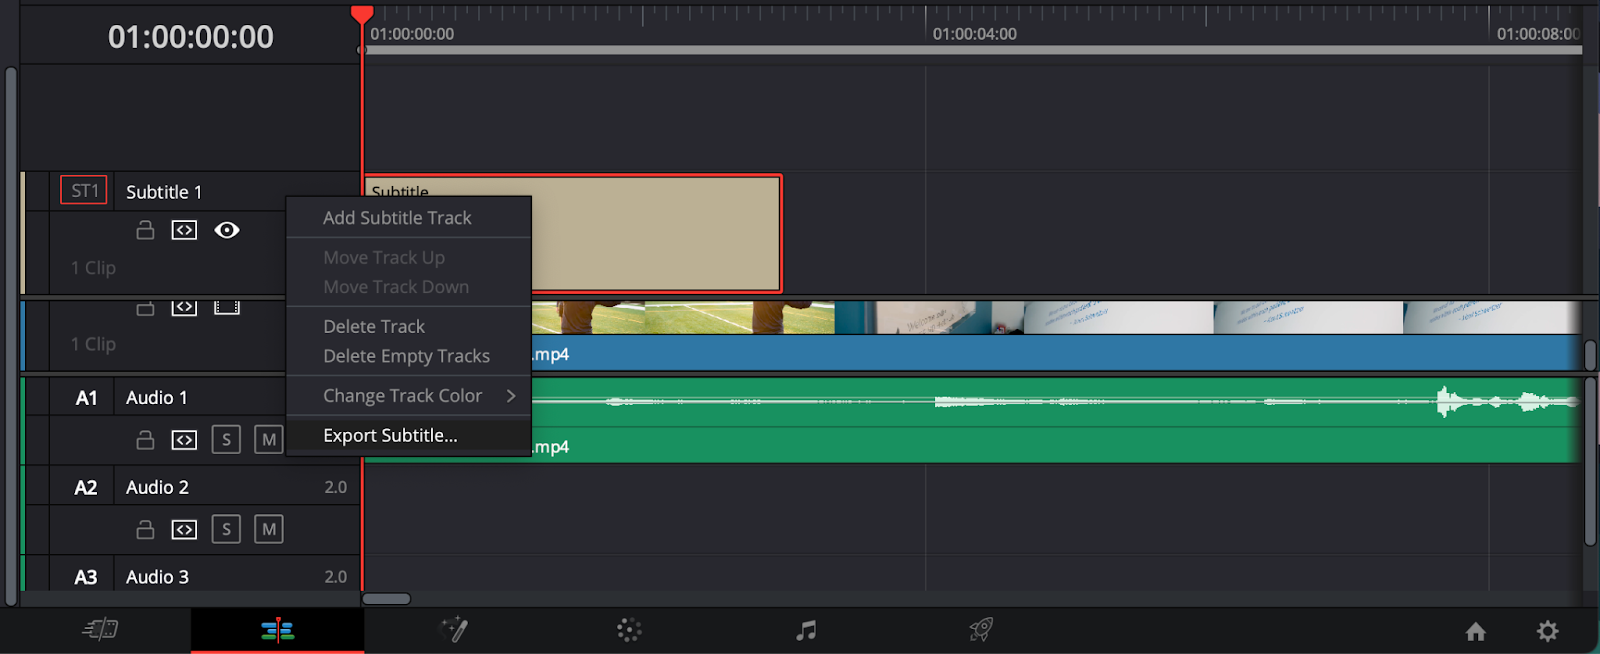
Another way you can add subtitles is by right-clicking inside the audio/video tracks located at the left of the timeline. A pop-up menu will then appear where you have the option to Add Subtitle Track. You’ll then want to right-click again inside of the subtitle track and select Add Subtitle.
Importing SRT files for subtitles in Resolve
What if you already have subtitles made for your project that need to be dropped into DaVinci Resolve? Well, a lot of workflows make use of SRT subtitles that need to be imported and exported.
The best way to import subtitles inside of DaVinci Resolve is by going to File > Import > Subtitle.
You’ll then want to go inside of your media pool and drag your subtitle file inside of your timeline. Afterward, you’ll be able to customize your subtitle settings as you normally would.
There are also options to export subtitles. One easy way you can do this is by right-clicking the audio/video tracks and clicking on Export subtitle. The same thing can be done by going to File > Export > Subtitle.
A better way to add subtitles in DaVinci Resolve
While DaVinci Resolve has some great subtitle options, it can be pretty limiting in a lot of areas. Luckily, Simon Says offers a powerful extension that works brilliantly in DaVinci Resolve. It provides users with automatic subtitles and a slew of closed captions features and file formats to play around with.
With Simon Says, you can add captions and subtitles to footage natively within DaVinci Resolve in 100 languages - all with the click of a button.
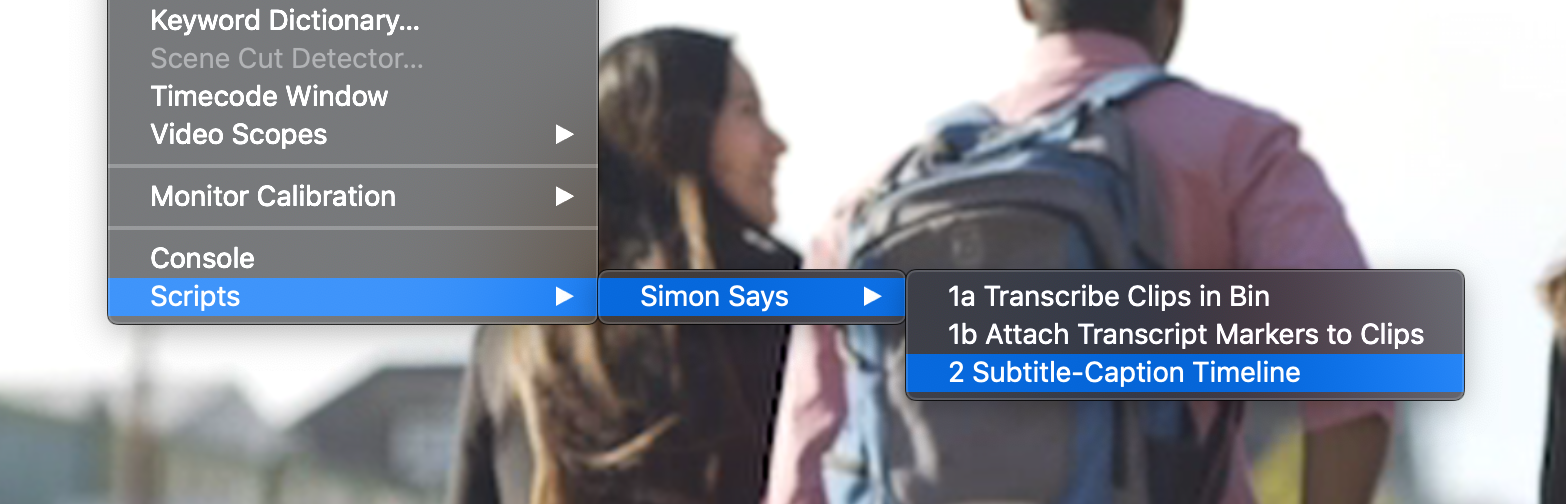
After you make a timeline active in Resolve, you simply go to Workspace > Scripts > Simon Says and then select "2 Subtitle-Caption Timeline", as seen below:
Once it exports, open the Simon Says app and you’ll see a new project. Simon Says then uploads the exported timeline for transcription. After that, you’ll want to click "Transcribe".
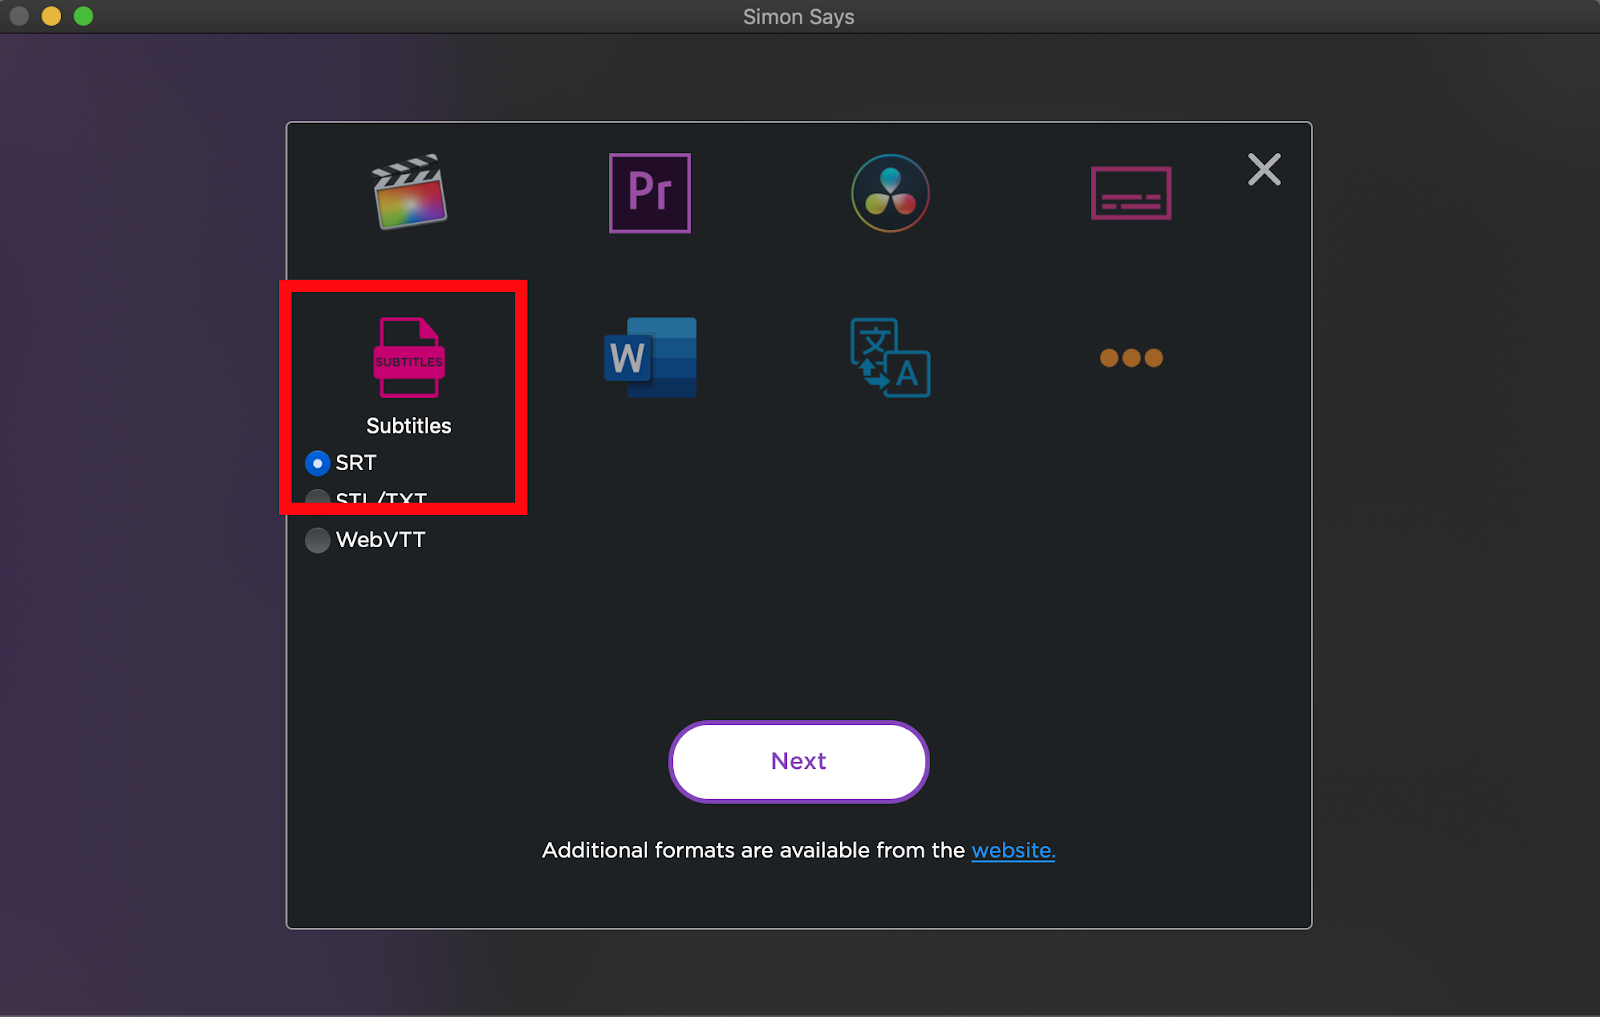
Once the transcription is complete, click Export. Choose SRT subtitles. It downloads to your Downloads folder. Unzip it and then go back to Resolve and locate the downloaded SRT file and import it
So, you can see how this can save you quite a bit of time. With Simon Says, you can also translate your transcription and subtitles to 100 supported languages. Plus, the app is lightweight so you don’t have to worry about it hindering the performance of Resolve.
.jpg)