

How to Add Transitions in DaVinci Resolve + 5 Great Examples
Video transitions are one of the many excellent tools in a video editor’s toolbelt. Transitions can be effective as a method of progressing the flow of a video, with some transitions even being able to convey emotions.
Transitions have come an incredibly long way. What was once a complex process is now as simple as dragging and dropping a digital effect. Every non-linear editor out there has a slew of transition presets ranging from simple to complex animations. Blackmagic Design’s DaVinci Resolve is no exception as it has phenomenal transition options for filmmakers and content creators.
Resolve transitions are simple and easy to use and are wonderful for beginners and professionals alike. This DaVinci Resolve tutorial will go over amazing transition ideas for all kinds of content as well as the types of transitions and how to use them.
Note: With Simon Says, you can take enhance your content even more by adding captions and subtitles natively in Resolve. The extension is easy to use and can significantly reduce the amount of time needed to caption your videos.
Adding a transition to your videos in DaVinci Resolve
Transitions are what brings viewers from one video clip to another. The goal of adding a transition is to make this journey completely seamless. A perfect transition should go completely unnoticed by your audience. Some really basic transitions can even be made yourself without the use of any sort of effects or plugins.
Adding transitions in DaVinci Resolve is similar to adding video effects. Like video effects, transitions can be created manually or through the use of templates. Most users will be going the template route when it comes to transitions.
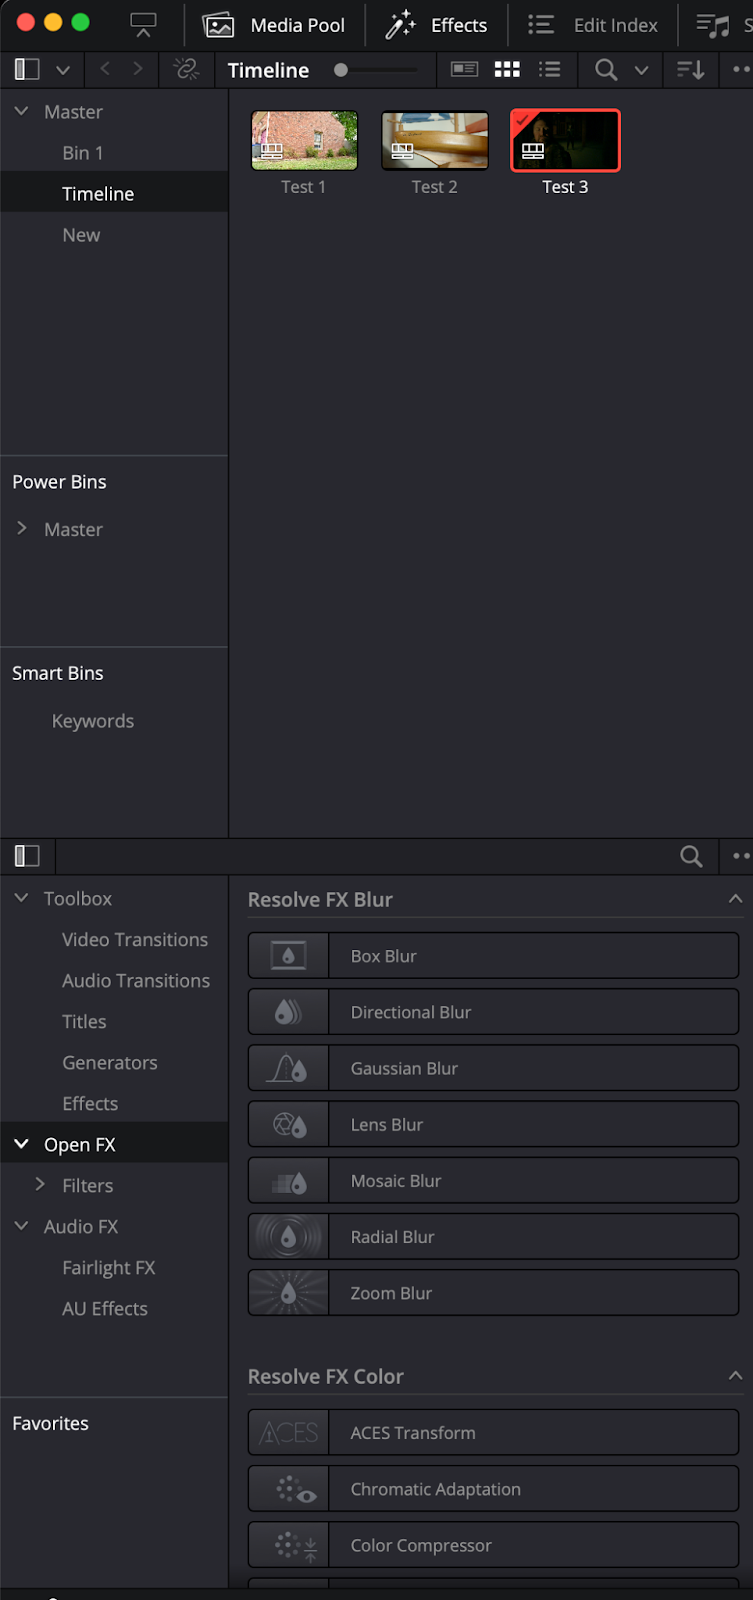
In DaVinci Resolve, transitions can be accessed by clicking the magic wand icon (Effects) in the upper left-hand corner. This opens a small window at the bottom of the screen containing video transitions, audio transitions for sound effects, motion graphics, and open FX.
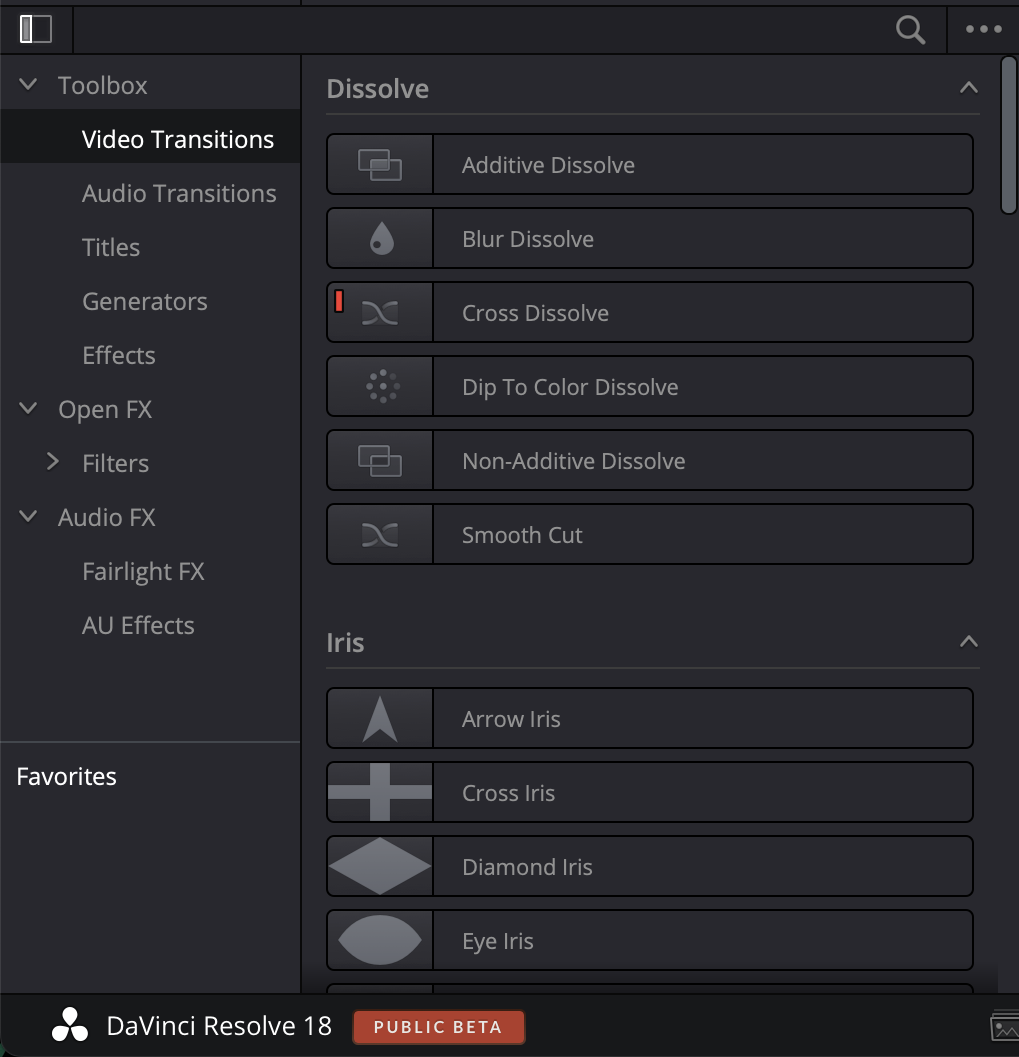
Clicking on Video Transitions will bring you to the transition effects tab containing all of the default transitions.
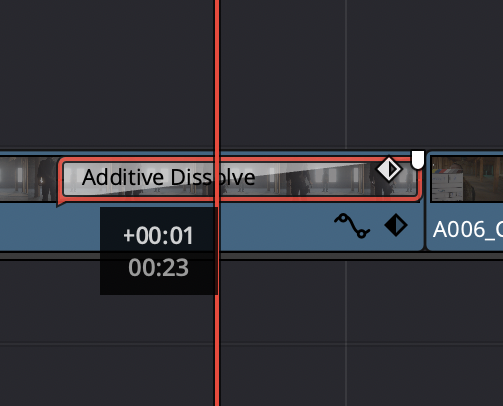
To apply a transition, all you need to do is drag and drop your desired effect on top of the footage in your timeline. Unlike programs like Adobe Premiere Pro and Apple’s Final Cut Pro, for DaVinci Resolve transitions, there needs to be extra room in your clip before the effect can be applied.
What this means is that you can’t apply effect if you use the entire length of your clip. The end or beginning of the clip needs to be shortened slightly before some transitions can be applied.
Right-clicking on transitions will allow you to add them to your favorites as well which is incredibly handy if there are certain transitions that you regularly use in video editing. You can also resize the transition by scaling the white transition box that appears on top of the footage.
How to create custom transition effects in DaVinci Resolve
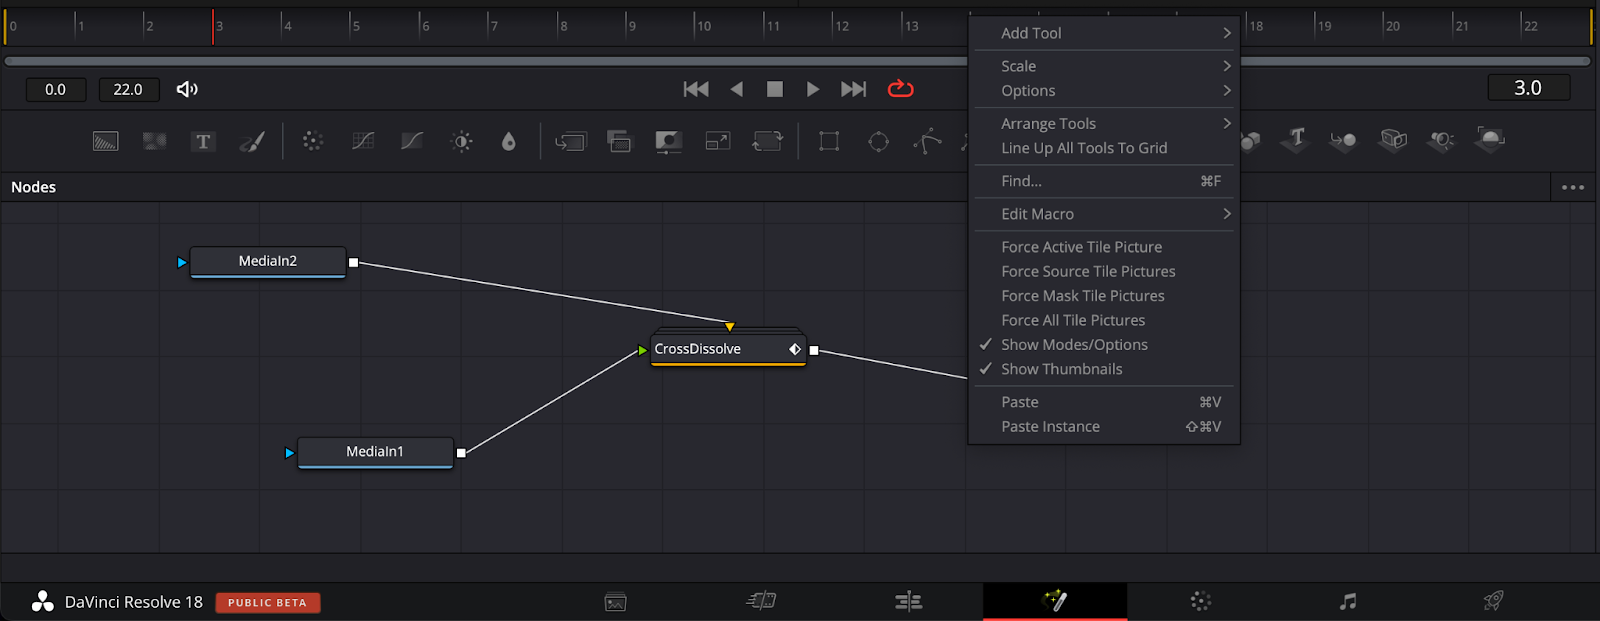
A really cool thing that DaVinci Resolve has to offer is custom transition effects. This means that you can create your own transitions right inside DaVinci Resolve. You can create your custom transitions within the Fusion tab of Resolve (found right beside the color grading tab).
You first need to Convert to Fusion Resolve and then right-click the transition and open transition in Fusion. This will bring you to a series of nodes that you can adjust to change the transition to your liking.
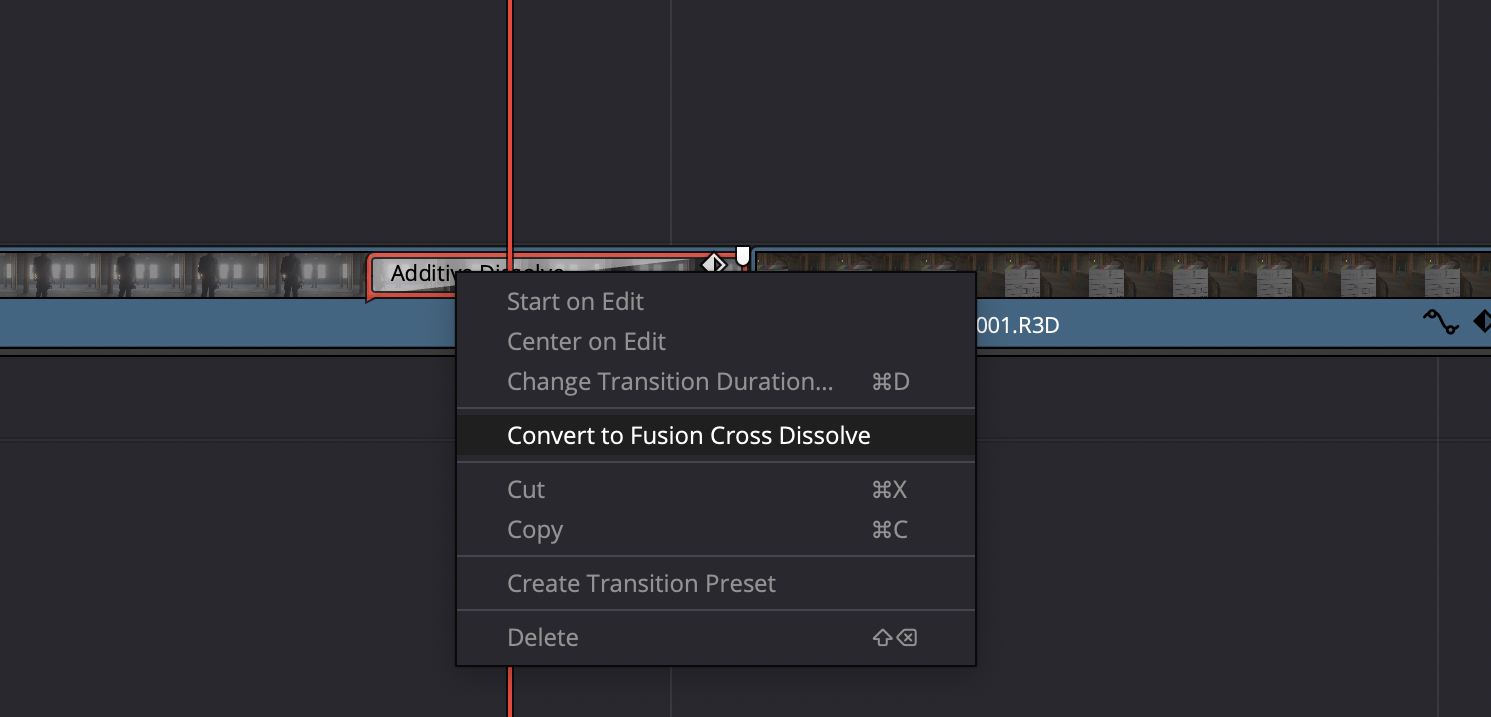
This is definitely a feature for much more advanced users who are familiar with Fusion. You can add tools by right-clicking on the grid and going to Add Tool. You can also do this by using the keyboard shortcuts shift + space.
Here, you can add effects such as motion blur and zooms to enhance the overall transition. Resolve has a very large effects library, so it’s great to play around and see what works best for you.
DaVinci Resolve transition examples
The transitions you use should always match the work you’re creating. It can be easy to get carried away and start using bombastic transitions such as the glitch transition for your content. While these types of transitions might look cool, they’re not always the most practical. Remember, transitions should be seamless and shouldn’t take up a ton of time.
There are, generally, a few expectations to this rule though. Hyper-stylized content thrives off of bombastic transitions. Things such as music videos, animations, and film genres like comedies use crazier transitions as a way to match the tone. Like anything, transitions are a creative choice that needs to match the type of content being made.
Here are some standard transition examples to try in your videos:
1. J Cut
The J Cut is a wildly simple and effective transition that is used constantly, often without people even realizing it. The J Cut is done by un-linking the audio on two clips and then moving the audio on one clip so that it overlaps with the second. Even though there’s a hard visual cut between the first and second clip, the audio of the second clip coming in gives the illusion of a smooth transition.
The J Cut is something used in countless films and documentaries. It’s a great transition for those creating films, vlogs, documentaries, or really any type of lifestyle content because of how natural it is.

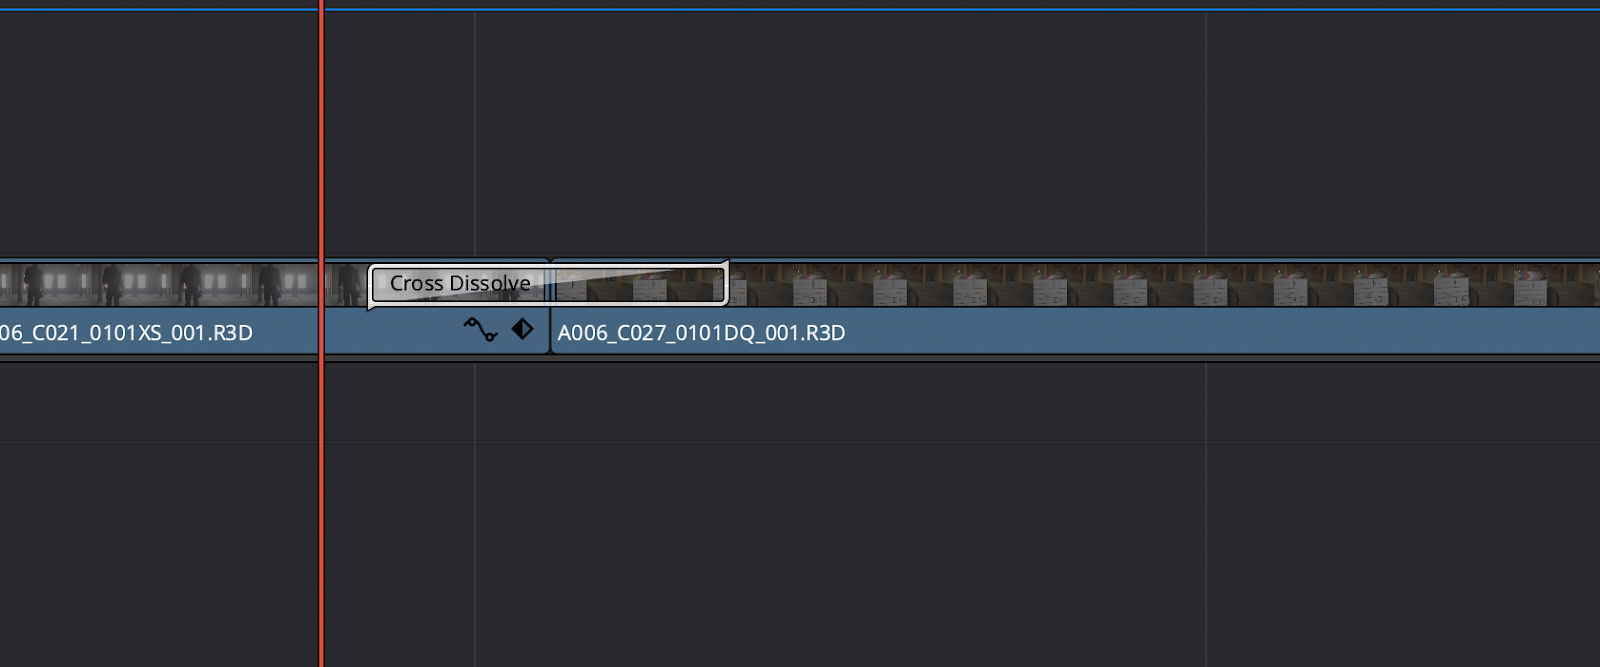
2. Cross Dissolve
The Cross-Dissolve is such a seamless yet effective transition. A cross dissolve is simply fading one clip’s opacity to zero while fading the other all the way up to one hundred. This can either be done by changing the opacity of the clip manually or by adding in the Cross-Dissolve template from the effects pannel.
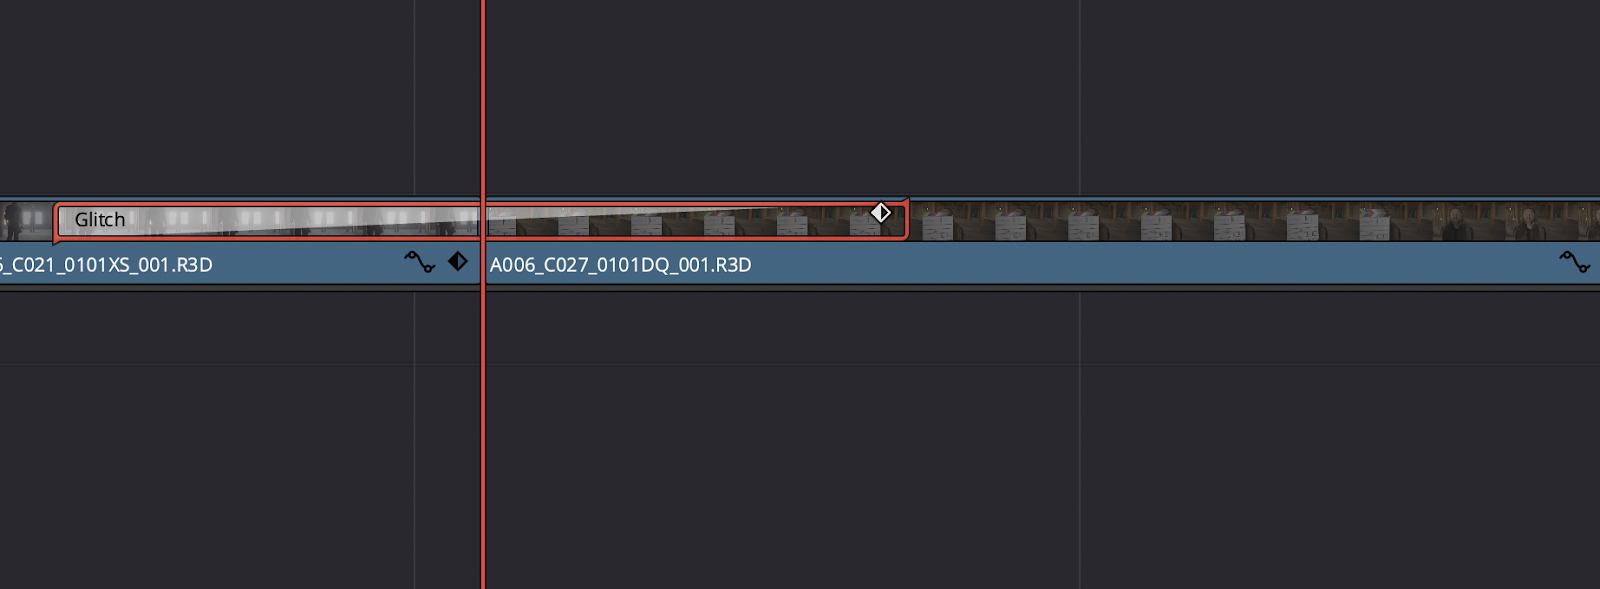
3. Glitch
The Glitch is a more bombastic transition, but great for social media content or videos that have high energy to them. The Glitch is labeled as a Fusion transition, a category of transition that’s much more complex than the standard ones.
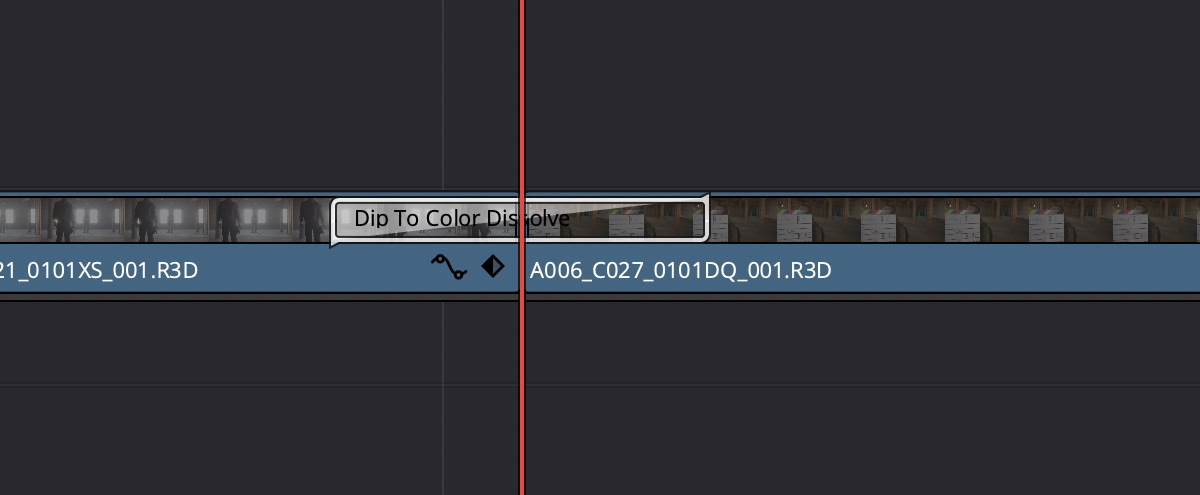
4. Dip to Color Dissolve
Dip to Color Dissolve (or fade to black) is a great transition for opening or closing your video. This is, again, most common in narrative films and documentaries. All this is doing is setting the opacity of the screen to zero, leaving it completely in darkness.
What this transition does is gives a sense of finality and closure or signify the start of something new. Fading to black can also be used to separate acts in a story or to signify the half-way-point in a piece of media.
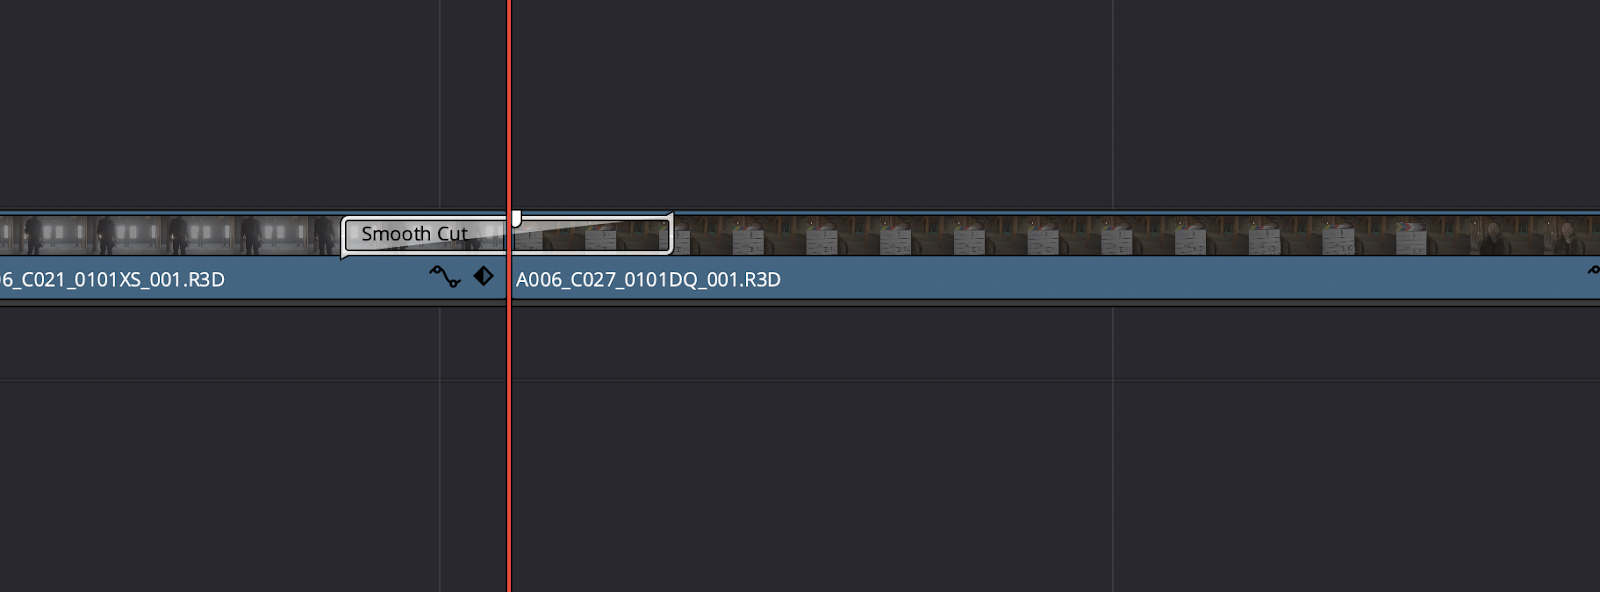
5. Smooth Cut
While this is can be more of an effect than a transition, it’s getting included simply because of how Blackmagic classifies it. The Smooth Cut is incredibly useful for those who shoot and edit a lot of interviews. The Smooth Cut takes two clips and blends them together to create one seamless clip.
For example, if you have an interview where the interviewee stutters, you can cut out the stutter, add the Smooth Cut, and make the entire sequence appear seamless.
While this isn’t always a perfectly seamless transition, when it works it really works. Just make sure that there isn’t any camera shake or quick speech patterns in the two clips where the Smooth cut is being applied.
Conclusion
Transitions can turn your video from professional to amateur incredibly fast if not done properly. That’s why it’s important to have a good understanding of transitions before beginning to edit content. DaVinci Resolve makes transitions painless to work with though because of the amazing built-in templates. When it comes to video editing, every second you can save on the content of the edit itself is key.
Simon Says helps you create wonderful captions in 100 different languages all directly within DaVinci Resolve. When combined with the tips in this post, you can transform your content into something truly special.

.jpg)
