

How to Create Speed Ramp in Premiere Pro
In the past, speeding up a clip would have to be done in the production phases using some sort of high-speed camera. Now, speeding up a clip can be done right in post-production. NLEs such as Adobe Premiere Pro CC, Final Cut Pro, and DaVinci Resolve has made speed-ramping footage more accessible than ever.
This beginner’s tutorial for macOS and windows devices will go over how to make speed changes inside Adobe Premiere Pro.
What is speed ramping?
Speed ramping is the process of digitally speeding up and then slowing down a video clip. This is a great technique for corporate videos or for hyper-stylized filmmakers. A speed ramp typically works best by speeding up slow-motion footage for a short period of time before slowing it down again. This technique was made popular in films through Zach Snyder who famously used this technique in the movie 300.
Slow-motion videos are typically best for the speed-ramping effect because of the high frame rate that it was shot at. A higher frame rate video leads to smooth speed ramping because of the number of frames in the video. While speed ramping is still incredibly possible at normal speeds, slow motion will for sure yield the best results.
So, why speed ramp? Well, for those in the corporate world of video editing or creating content for social media, speed ramping is almost an absolute necessity. Speed ramping can be used to bring the audience from one scene to the next in a spectacular fashion or to emphasize a certain point in the video. In filmmaking, it can be used to make a scene more “epic” seeming than it would normally be.
If you can, keep speed ramping in mind while shooting your video. Knowing what you’re going to speed ramp in post-production makes the actual speed ramp itself look much better than it normally would.
Creating a speed ramp in Premiere Pro
There are a few different ways to speed ramp inside Adobe Premiere Pro. Something to note is that speed ramping is NOT the same as changing the frame rate of your video. Changing the FPS gives a much different effect than speed ramping does.
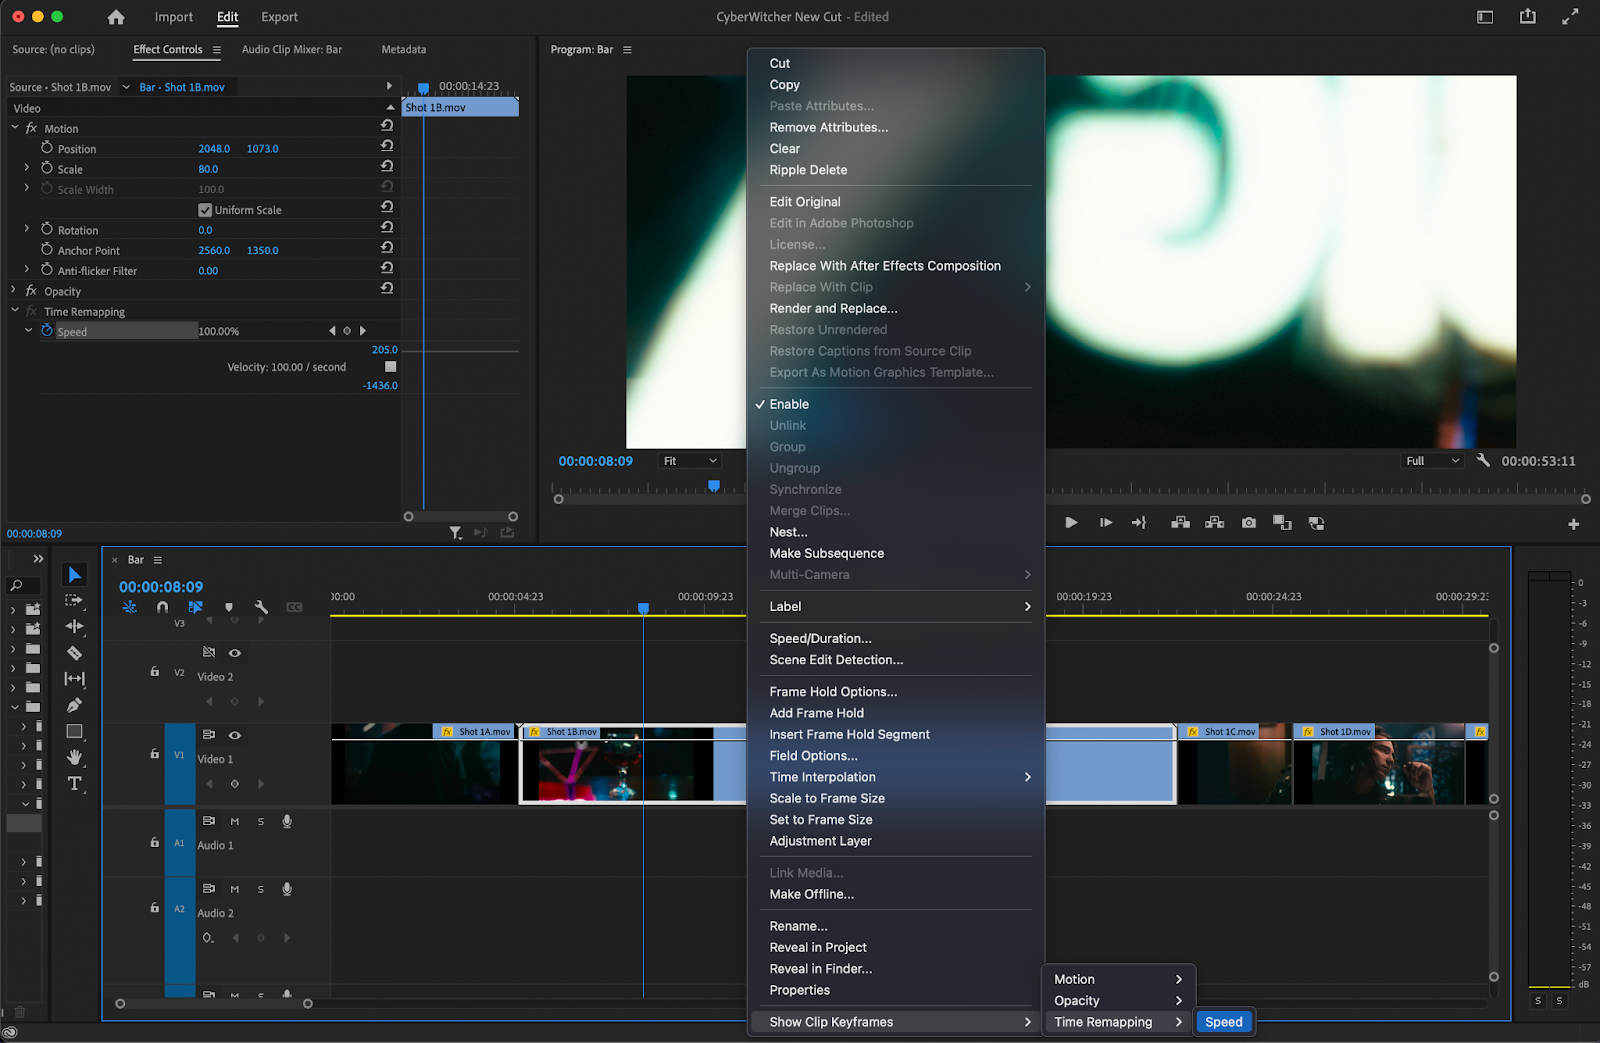
Time remapping in Adobe Premiere Pro is incredibly easy and can be done with only a few clicks. You can change the speed of your clip by right-clicking on your video clip and going to Show Clip Keyframes > Time Remapping > Speed. A white line will then appear in the center of your video clip. If you COMMAND or CTRL-click the white line inside of your video clip, an arrow with a dotted line will appear. These will serve as markers for your speed ramp.
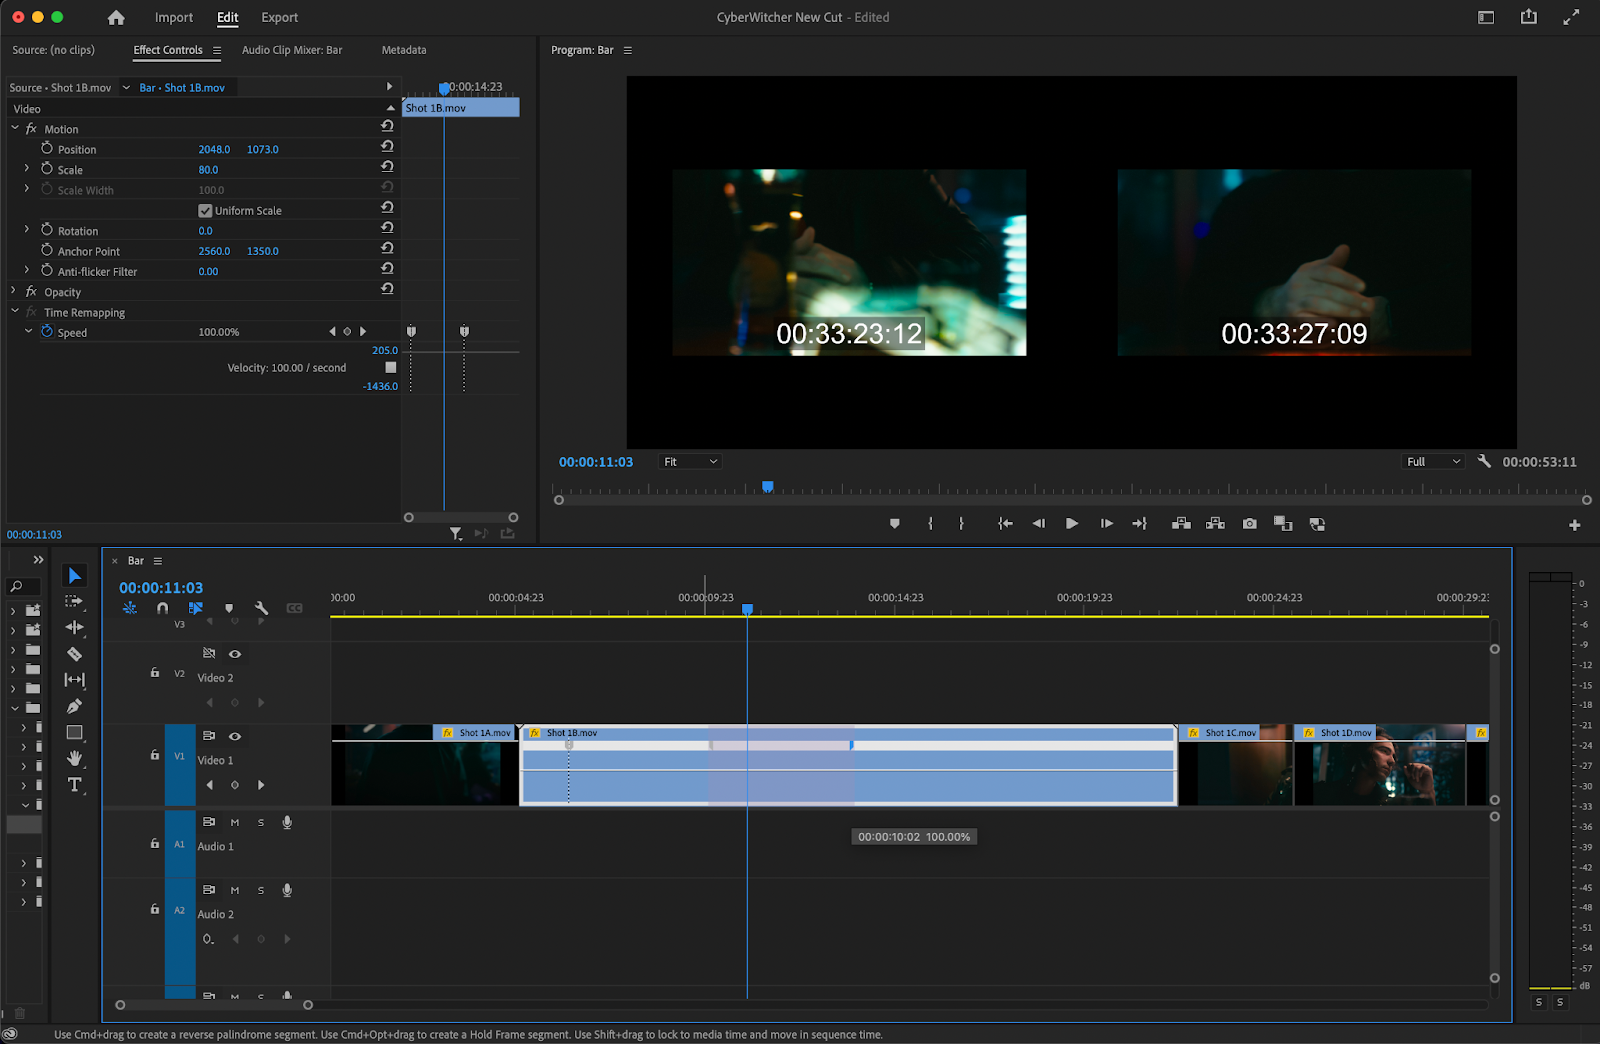
Moving these points up and down will result in different speeds for your video clip. You can drag these points to the left or the right to result in a smooth speed ramp transition.
Moving the white line up will ramp up the speed of your clip and moving the white line down will ramp down the speed of your clip. Upon playback, you should see your video speed up or speed down. Play around with this technique a little bit to see which video speed works best for your video.
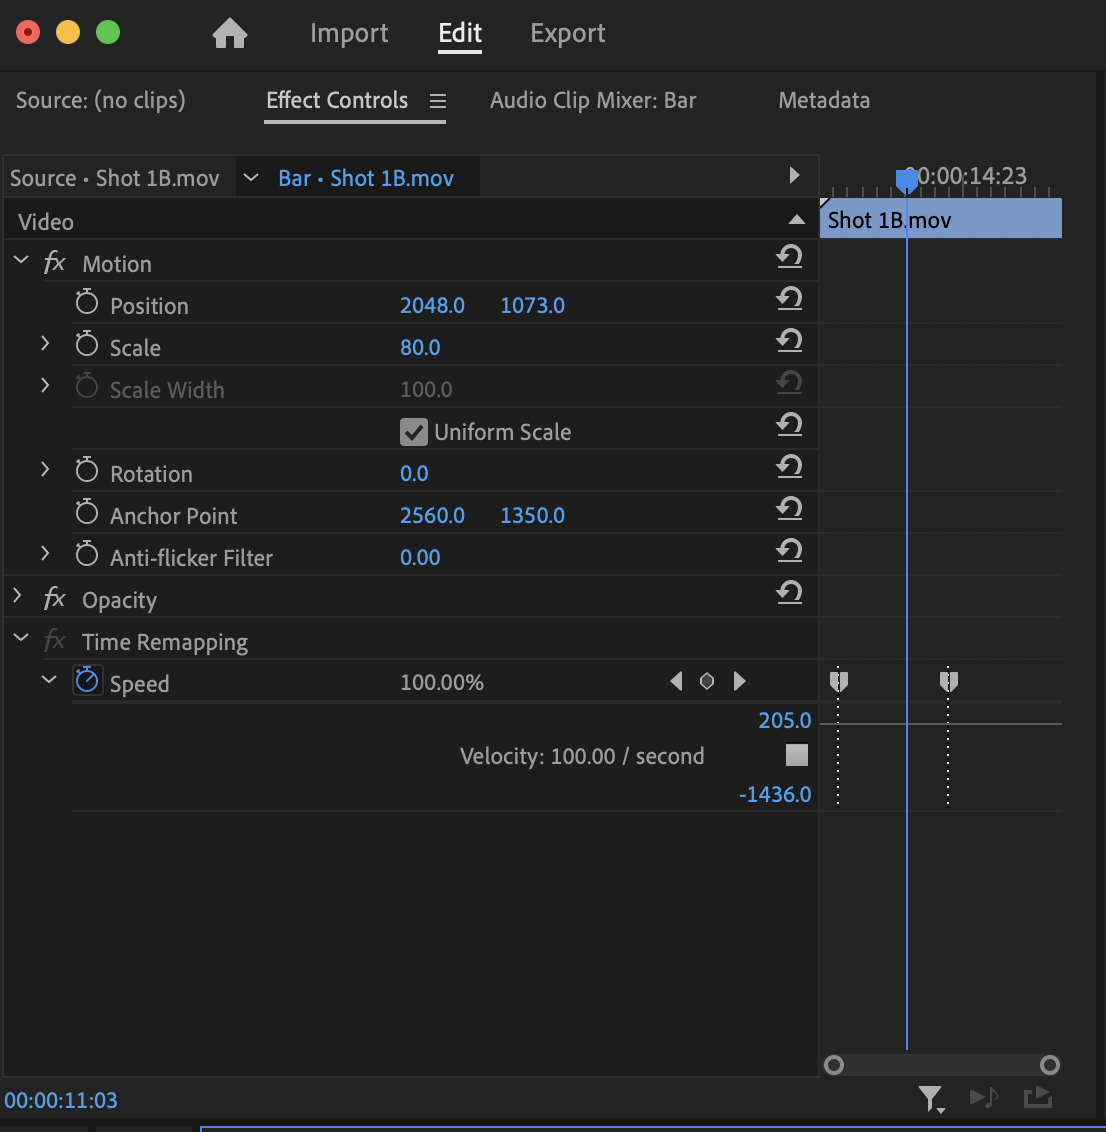
You can also add keyframes in the effects control panel by clicking on the keyframe icon. This will create more of those dotted lines with the arrow. There are a lot of speed-ramping techniques that can be utilized once you master this effect. Smooth transitions can be created through the use of premiere pro speed ramps as well as intense pans or whips with a lot of motion blur.
Again, speed ramping is something that is hyper-specific to the type of content you’re trying to create, so play around with it using these techniques to see what you’re able to come up with.
If you’d like, you can also use the Adobe dynamic link to bring your footage straight into After Effects to speed ramp it that way. After Effects will allow you slightly more control when it comes to changing the speed/duration of your clip.
Like with all things though, it’s best not to overdo the speed-ramping effect. If overdone, speed ramping can be nauseating and make your edit look cheap. Speed ramping is best used once or twice during a short video to emphasize a very specific point.
Conclusion
Speed ramping in apps such as Adobe Premiere Pro is such a simple yet effective way to add production value to your content. If done well, a speed ramp can elevate content to an insane degree and make for a rollercoaster of a ride.
If you need captions and subtitles for your videos, check out the Simon Says extension for Premiere Pro. It allows you to seamlessly translate, transcribe, and caption video natively in Premiere Pro for 100 different languages.

