How to Stabilize Video Footage in DaVinci Resolve
Video stabilization is one of the most common “fix it in post” effects that you’ll find in any NLE and as well as a slew of great 3rd party plugins. Shaky footage can destroy otherwise amazing shots, so being able to fix this in post is huge.
Software such as After Effects completely revolve around making this process easier. It just so happens that DaVinci Resolve (an all in one NLE) has one of the best stabilizers in the business though. This quick, crash course DaVinci Resolve tutorial will go over everything you need to know about video stabilization in DaVinci Resolve 16, DaVinci Resolve 17, and DaVinci Resolve 18 for all sorts of production workflows.
Shooting For Stabilization
When you’re shooting your videos, keep two things in mind if you know you’re going to be stabilizing the video in post-production. Both of them have to do with how you shoot your video. The first is to always make sure you record in a well-lit environment. Stabilization software is great but can be incredibly demanding under low-light conditions. Stabilization effects can often fall apart and get the jitters (that jelloy look) under these conditions.
The second thing has to do with the depth of field. Now, this is a tricky one since a shallow depth of field gives footage that “cinematic” look, and shooting with a deep one gives it a more “flat” and “amateurish” look if you don’t know what you’re doing.
Shooting with a deep depth of field stops your movement from looking like jello once you add the stabilization effect to it.
Stabilizing video from the Edit tab
The first way to easily add the stabilization effect in DaVinci Resolve is through the Edit Page. The Edit Page in DaVinci Resolve can be found at the bottom of the screen next to the Media, Cut, Fusion, and Color Pages.
Clicking on the edit page will bring you to a large timeline, a playback window, a media pool, and something known as an Inspector.
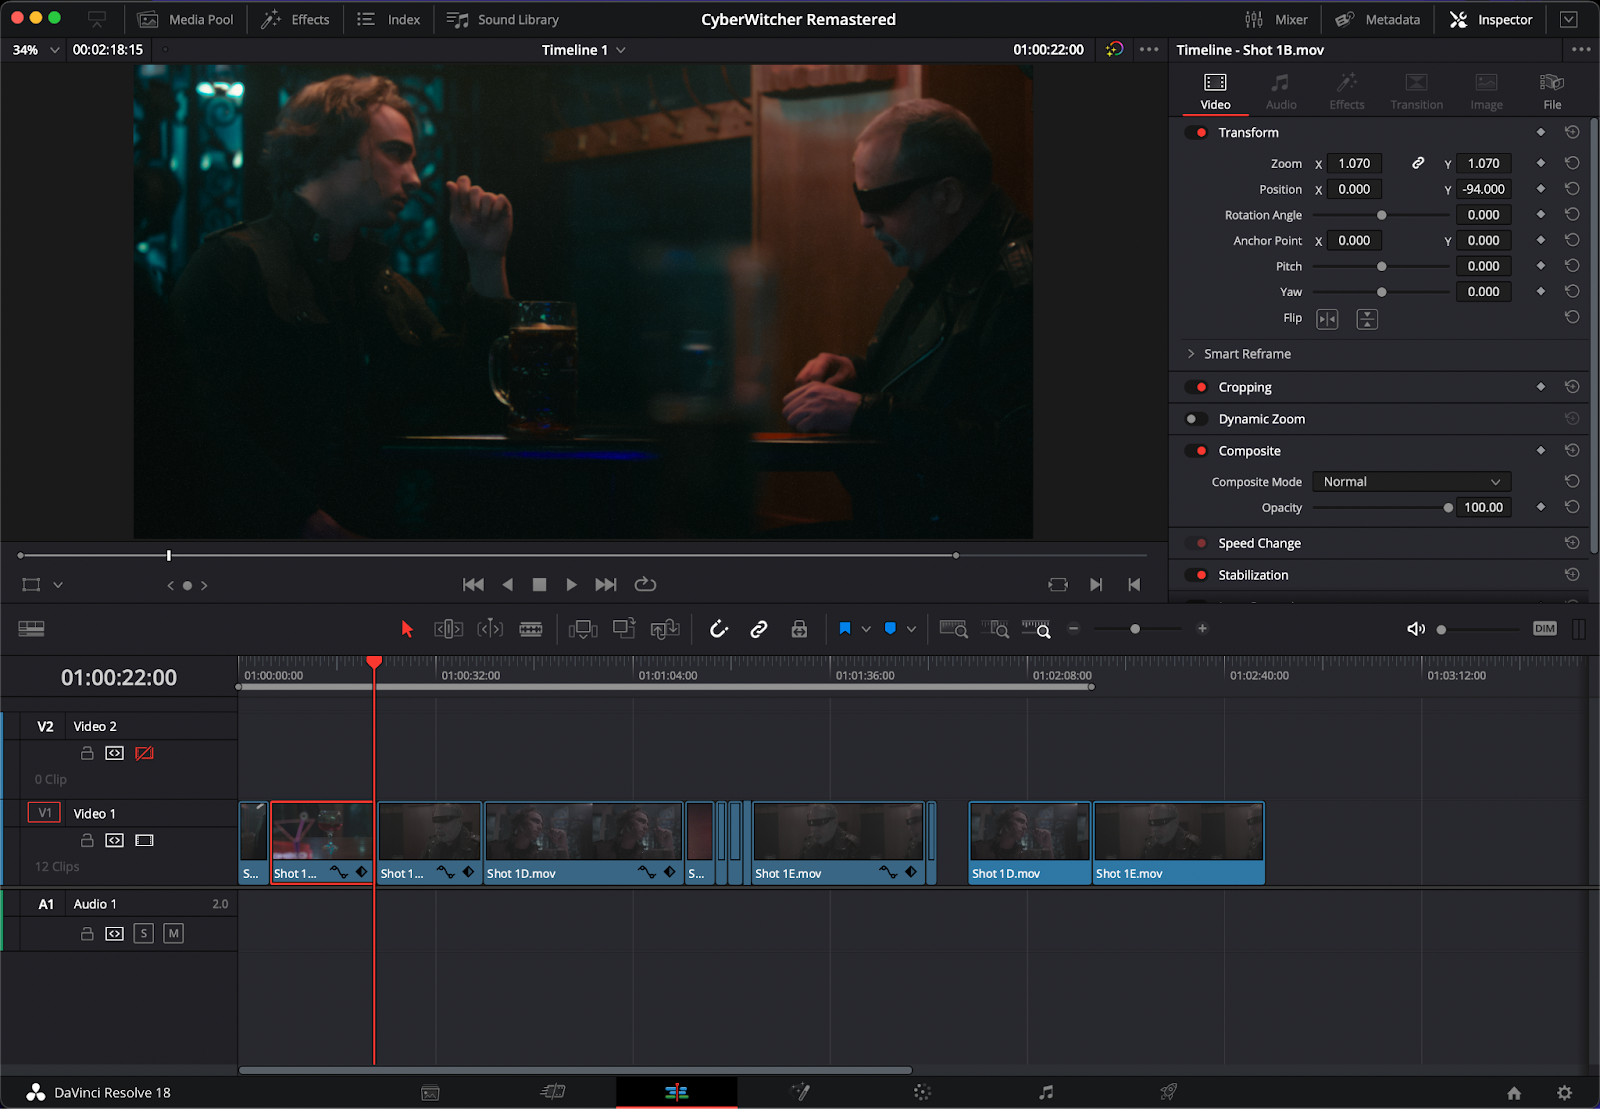
The inspector is where you’ll be stabilizing your footage. Bring the footage you want to stabilize into your timeline and click on it. Then, go over to the inspector window and scroll all the way down to the bottom.
Here, you’ll find a submenu labeled Stabilization. Open this submenu up to reveal a slew of different stabilization modes. Clicking the red button on the left-hand side will activate and deactivate your stabilization.
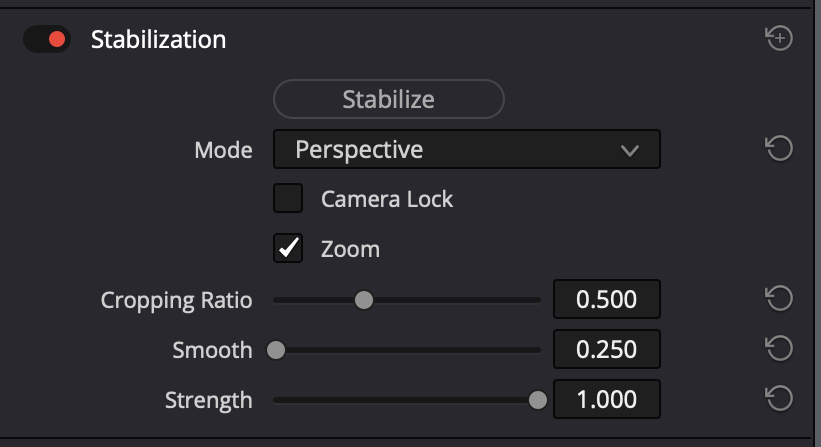
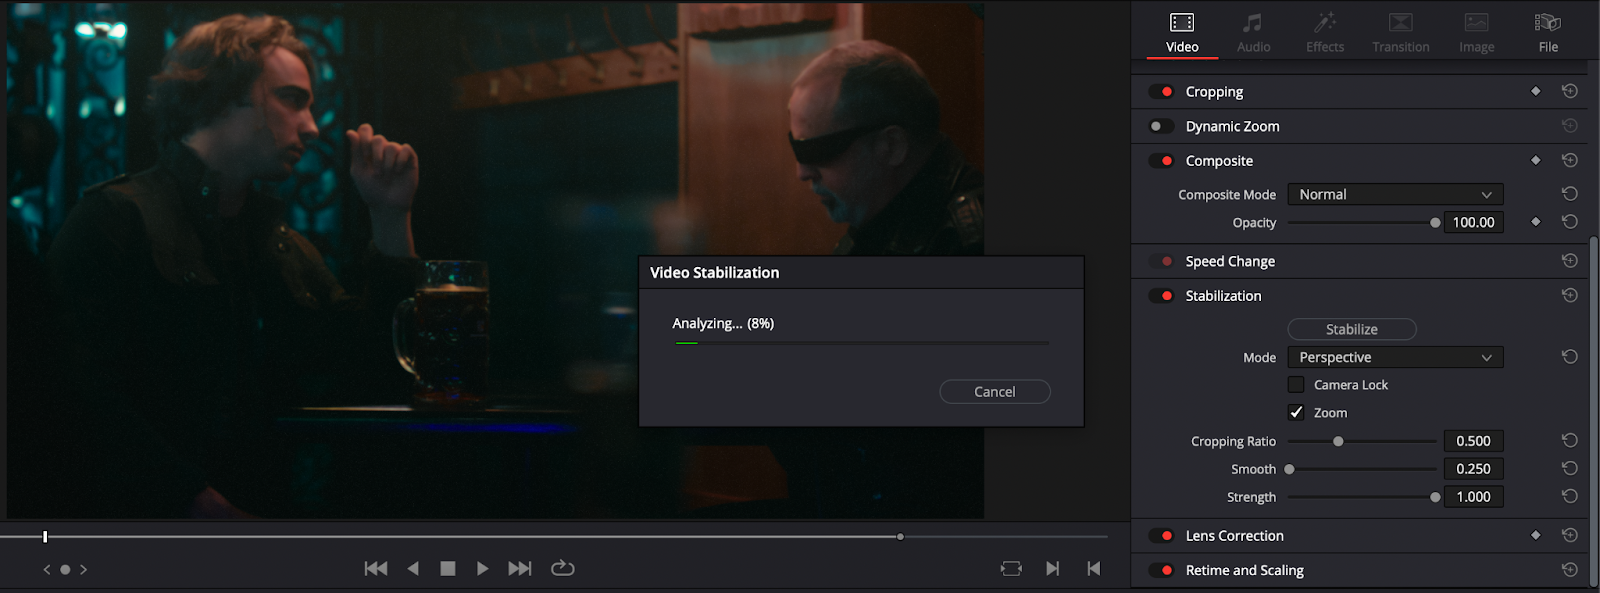
Once the stabilization menu is open, click on the stabilize button to begin the stabilization process. DaVinci Resolve has an algorithm that goes through your full video and picks out the larger movements.
Beneath the stabilize button are a few different options for how DaVinci Resolve stabilizes your footage. There’s a perspective, similarity, and translation. Perspective is similar to warp stabilization in Premiere Pro and looks at all the jitters in your footage. Similarity analyzes your footage pan, tilt, and rotation. Finally, translation analyzes your footage’s pan and title but not the rotation.
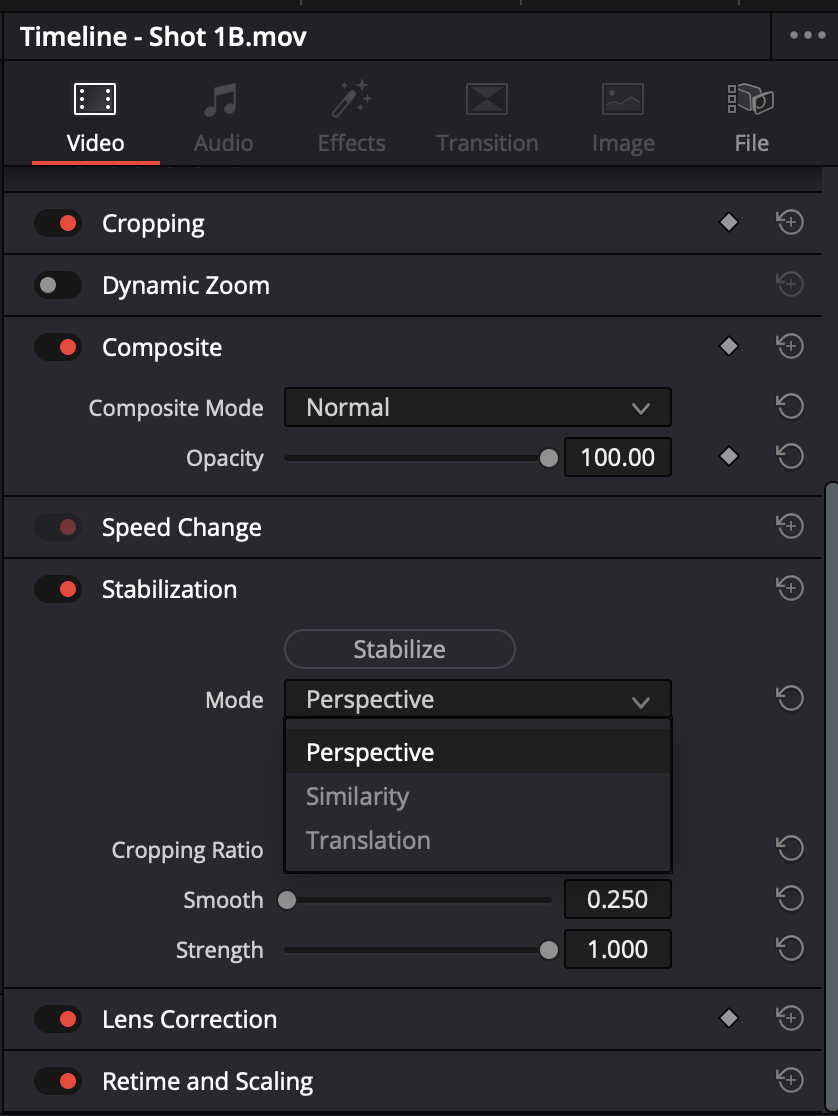
Beneath all of this is a checkbox labeled Camera Lock. What camera lock does is tries to mimic a tripod effect on your footage. This effect can vary though depending on how much movement your footage has.
There’s the Zoom function which removes any black bars that may be present after your footage is stabilized. For the most part, it’s best to always keep this box checked.
After that, there’s a Cropping Ratio slider. Adjusting this slider will tell DaVinci how much you want your footage cropped once it’s stabilized.
The Smooth Slide changes how smoothly the movements are interpreted when the stabilization effect is applied.
Lastly, there’s Strength Slider that determines just how intense the stabilization effect is on your footage. Keep in mind, the higher this slider is the weirder your footage may look. Putting this setting too high may make your footage look like jello.
Stabilizing footage depends entirely on the user, and there are no “one size fits all” settings. It’s best to stabilize your footage with the default settings and go from there.
Once you click the Stabilize Button, a progress bar will show up on the screen telling you how long is left on the stabilization. After you play back your footage, you’ll be able to make changes in real-time (with DaVinci Resolve constantly updating them for you).
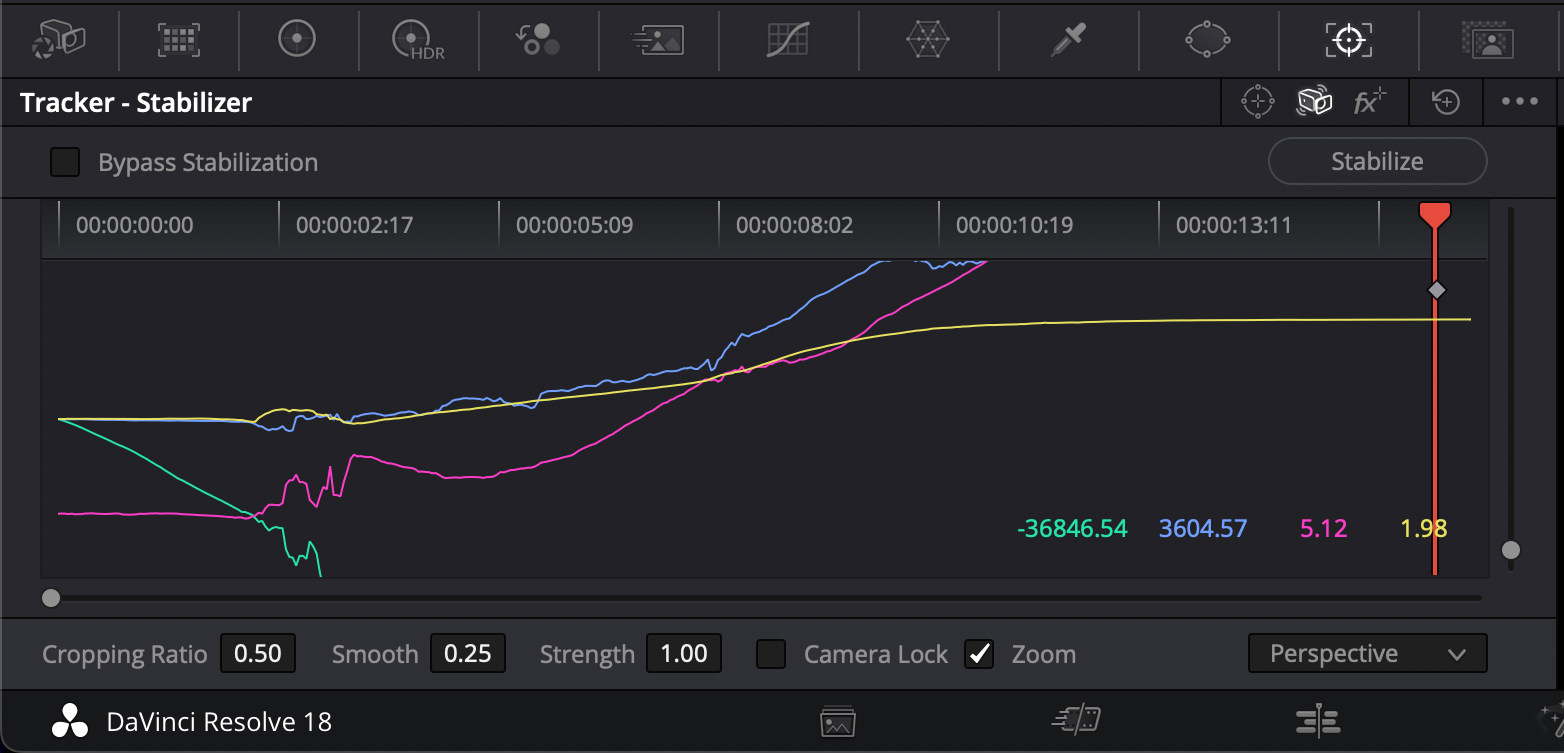
Stabilizing video from the Color tab
Video stabilization in DaVinci Resolve can also be done entirely within the Color tab. The color tab is located next to the editing page (or editing tab) and hosts a slew of incredibly powerful coloring options. This method is a bit more complex than doing it within the edit tab but gives users much more control over how their footage is stabilized.
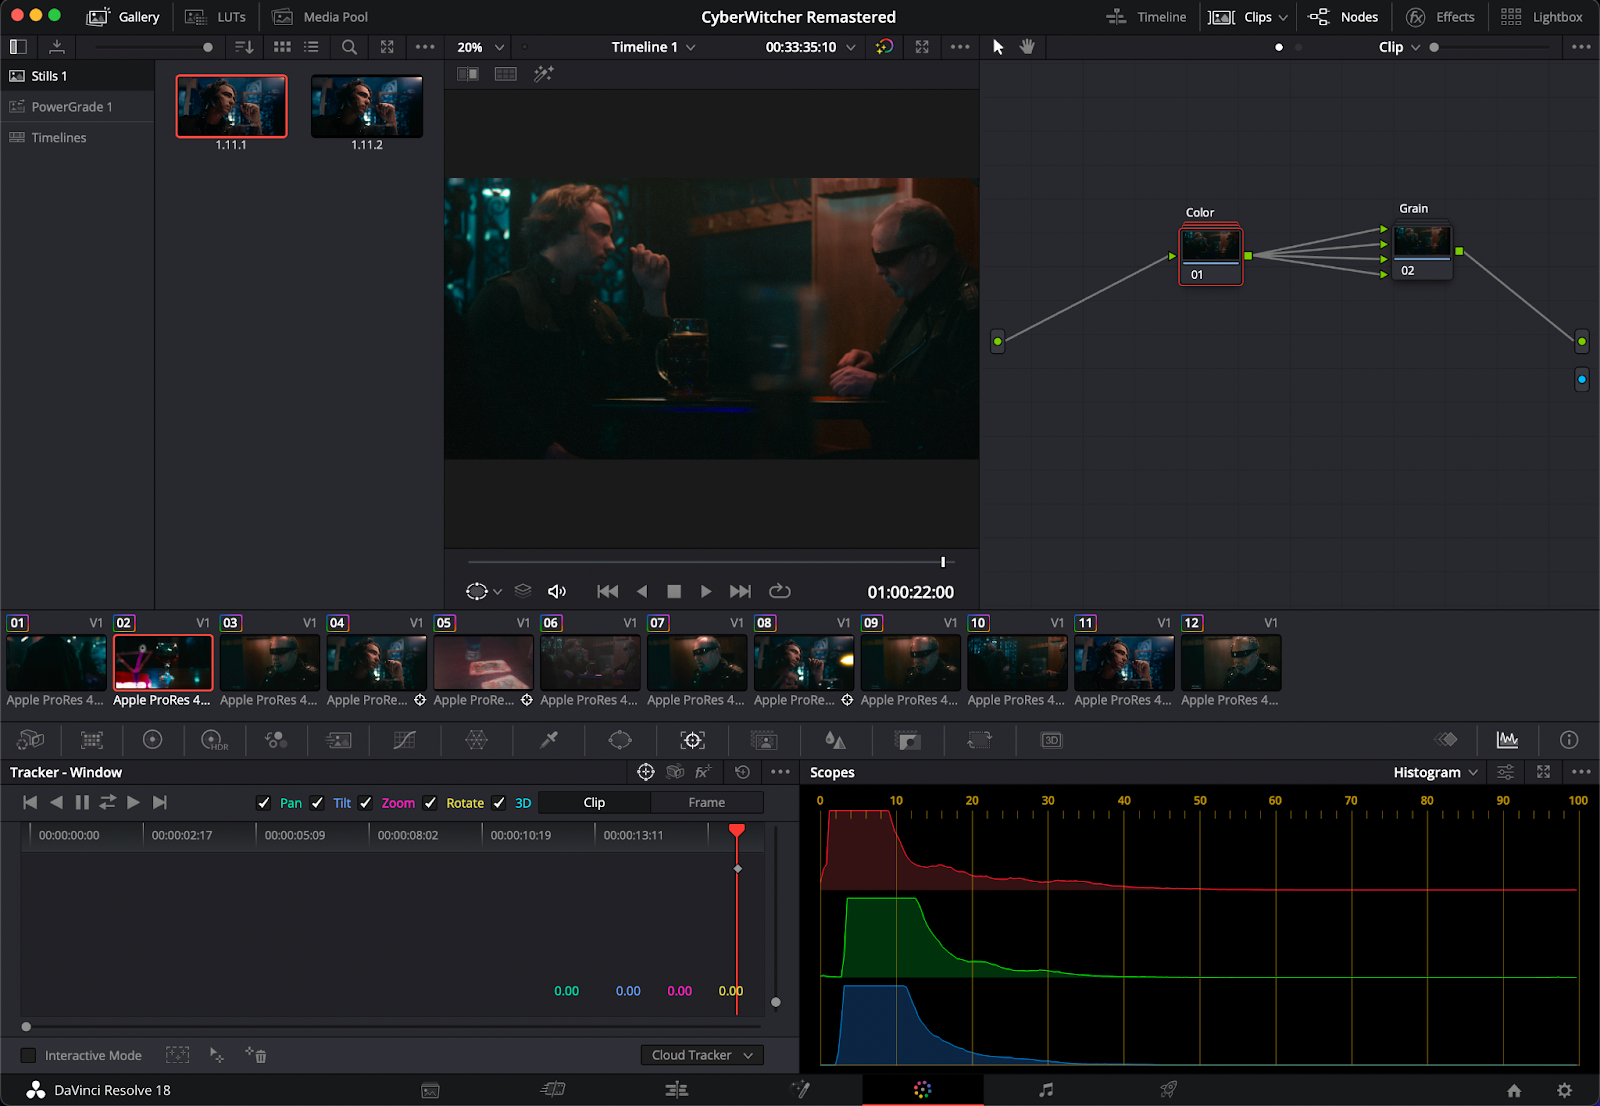
Once you’re in the color tab, you’ll want to go the window marked Tracker. The tracker window lets you track all sorts of things in DaVinci Resolve such as power windows and objects. It also tracks the camera for you. Click on the camera icon labeled Stabilizer to bring up the tracking window stabilization tool.
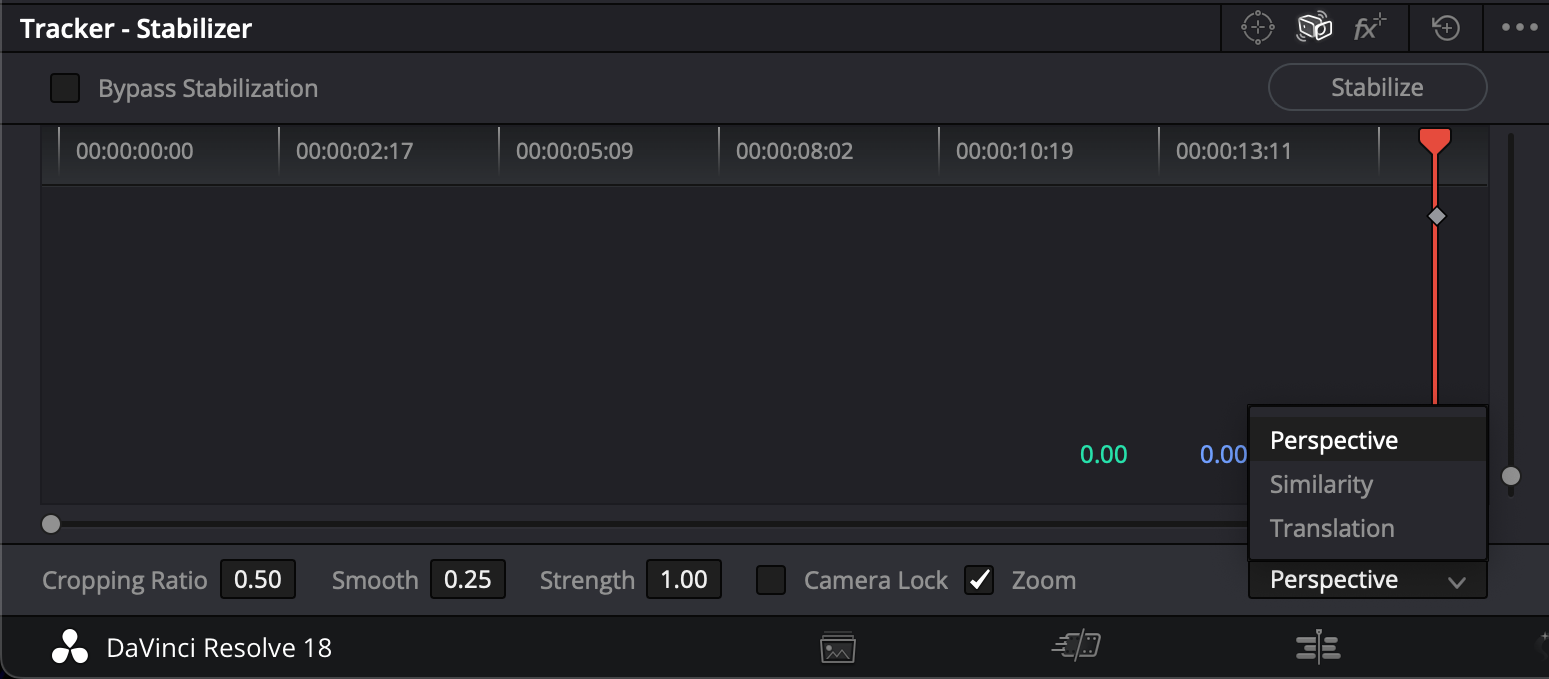
Here, you’ll be given incredibly similar options as to what was found in the edit page, including options for Perspective, Similarity, and Translation stabilization. Once you stabilize your footage, you’ll be presented with a chart that shows what’s exactly going on during the stabilization process, with lines indicating the x, y, and z axis.
Summary
Post-production video stabilization has come such a long way, saving creators countless hours and dollars on equipment such as a gimbal. In the right conditions, digital stabilization can look just as good if not better than physical stabilization. With content creation, the more time and money you can save the better.
3rd party extensions such as Simon Says can be so wonderful precisely because of how much time and money it saves creators, transcribing footage natively within DaVinci Resolve in 100 languages.